How To Create Dynamic Content In Wordpress
You would be forgiven for automatically thinking that a custom website would take hours of coding to complete. In fact, the open secret in WordPress is that it is now easier than ever to build complex websites with dynamic content without using any coding at all.
Thanks to last year's release of Gutenberg designing your websites on the back-end is now possible without spending significant amounts of time on PHP or even HTML or CSS. In fact, you can simply use Gutenberg's famous blocks and its integrated plugins such as Toolset to build everything.
One of the easiest ways to turn your website from basic to professional is by including dynamic content. The good news is that with Toolset and OceanWP it is easy to bring dynamic content to your website. Before we go through how you do it let's first explain exactly what we are talking about.
What is dynamic content?
With dynamic content, WordPress pulls the correct information from the database to display to the user depending on the page or post it is used on. It is in contrast to static content which does not pull any data from the database.
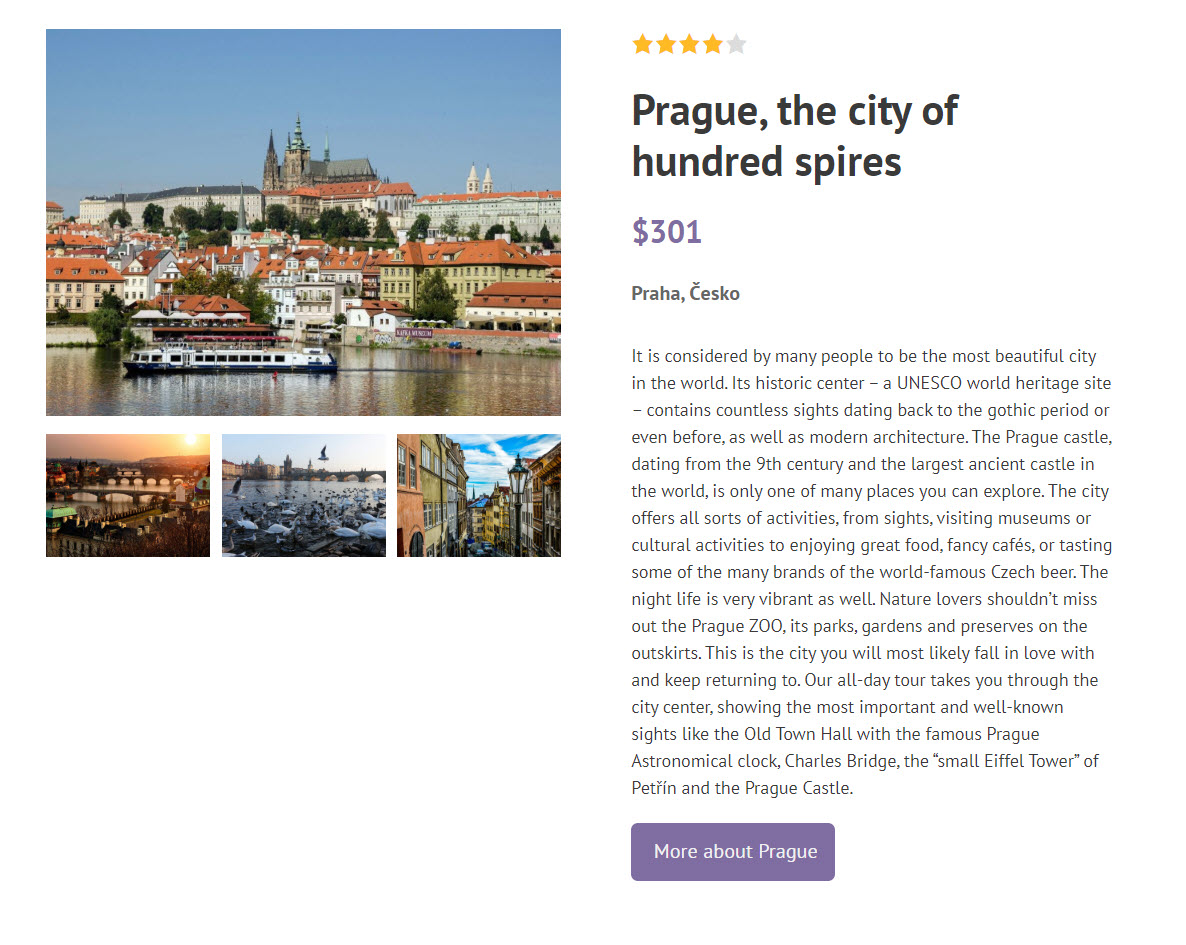
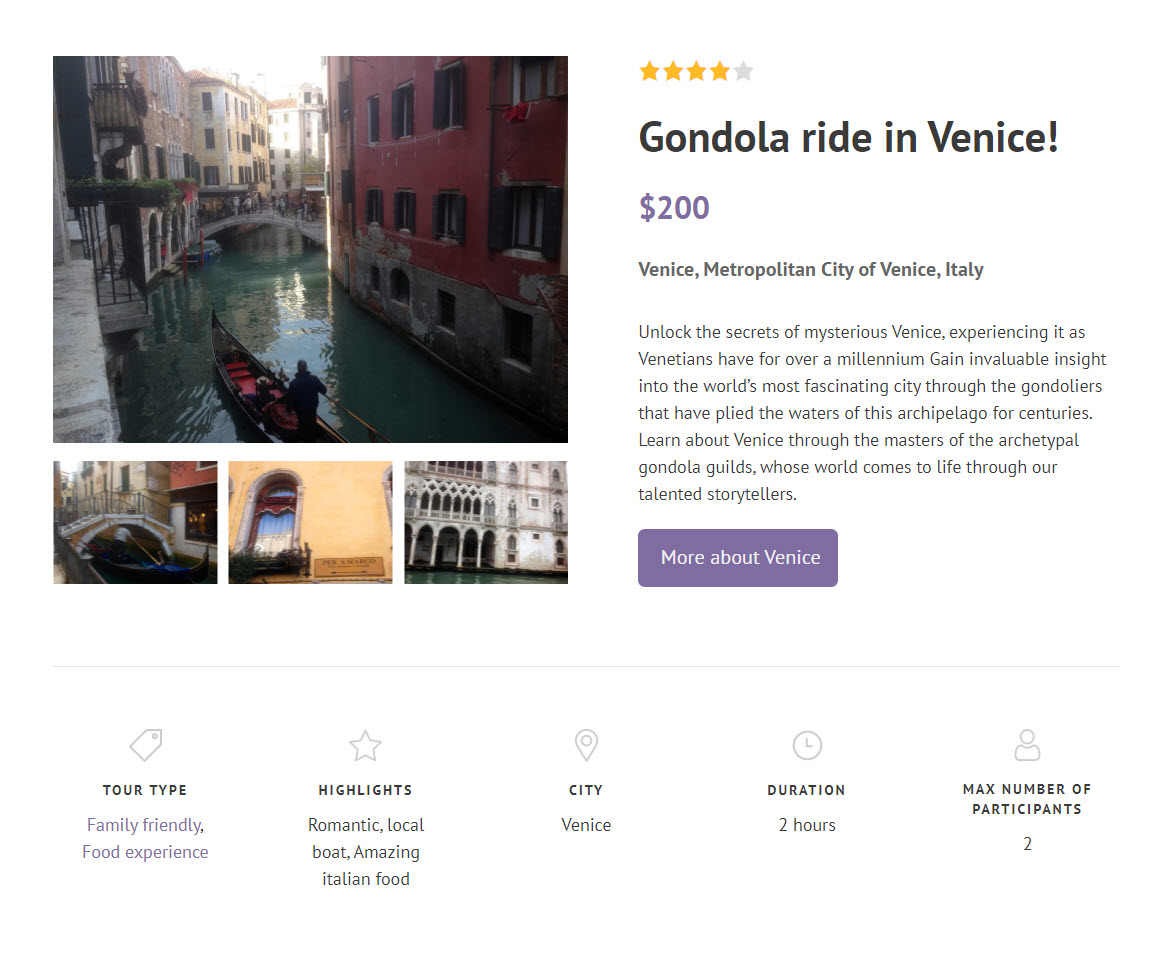
For example, if you have a travel website with a number of different trips – such as one for Prague and one for Venice – a user will expect to see content about Prague when they click on "Prague" and the same for Venice. Both posts could have exactly the same layout but with different content. This is dynamic content.
Why we're using OceanWP and Toolset
Toolset and OceanWP are both completely integrated and provide the perfect combination for creating a professional website with dynamic content.
Toolset comes from the Toolset team which specializes in making it easy for both professional programmers and non-coders to build custom websites. Specifically, Toolset brings a number of advantages:
- No need to switch between the back-end and front-end. Instead of wasting valuable time having to check your designs on the front-end you can be safe in the knowledge that what you see on the back-end is what you will get when you hit publish.
- A simpler workflow. Previously on custom websites, a designer might have created their website layouts on one platform and then a developer would have had to implement them on WordPress. Now one person, regardless of their abilities, can create and display everything on WordPress.
- Non-developers can build the website they want. Instead of compromising on their designs, non-developers can now carry out their website-building ambitions and create exactly what they wanted thanks to the simple Gutenberg interface and Toolset' potential.
- Save time reading documentation. Toolset is very straightforward to use and test out. Therefore, instead of reading lots of documentation you can dedicate your time to experimenting and creating content on WordPress.
- Fewer integrations with third-party plugins. The new Gutenberg Editor and its integration with a large number of WordPress plugins such as Toolset mean you can rely on fewer third-party plugins to build your website. As a result, your website is less bloated with fewer plugins and you do not need to rely on third parties updating their plugins.
- Follow the same workflow as the WordPress core. You do not need to worry about changing how you work with the new WordPress editor.
Incidentally, if you want to learn more about using Gutenberg then a great resource is this WordPress Gutenberg tutorial on creating custom websites using blocks.
Meanwhile, OceanWP is one of the most popular websites on WordPress for businesses. Websites that are run by OceanWP have improved conversion rates, load times and SEO. Website owners can benefit hugely by combining OceanWP with Toolset to create beautiful custom websites.
Examples of what you can create using OceanWP and Toolset
Below we will go through four features you can create using OceanWP and Toolset.
How to create templates to display posts
To create your design for your posts you need to build a template. All you need to do is create a template for your custom post type once and all of the posts attributed to it will be under the same design.
Below is an example of a template I created for my custom post type for tours.
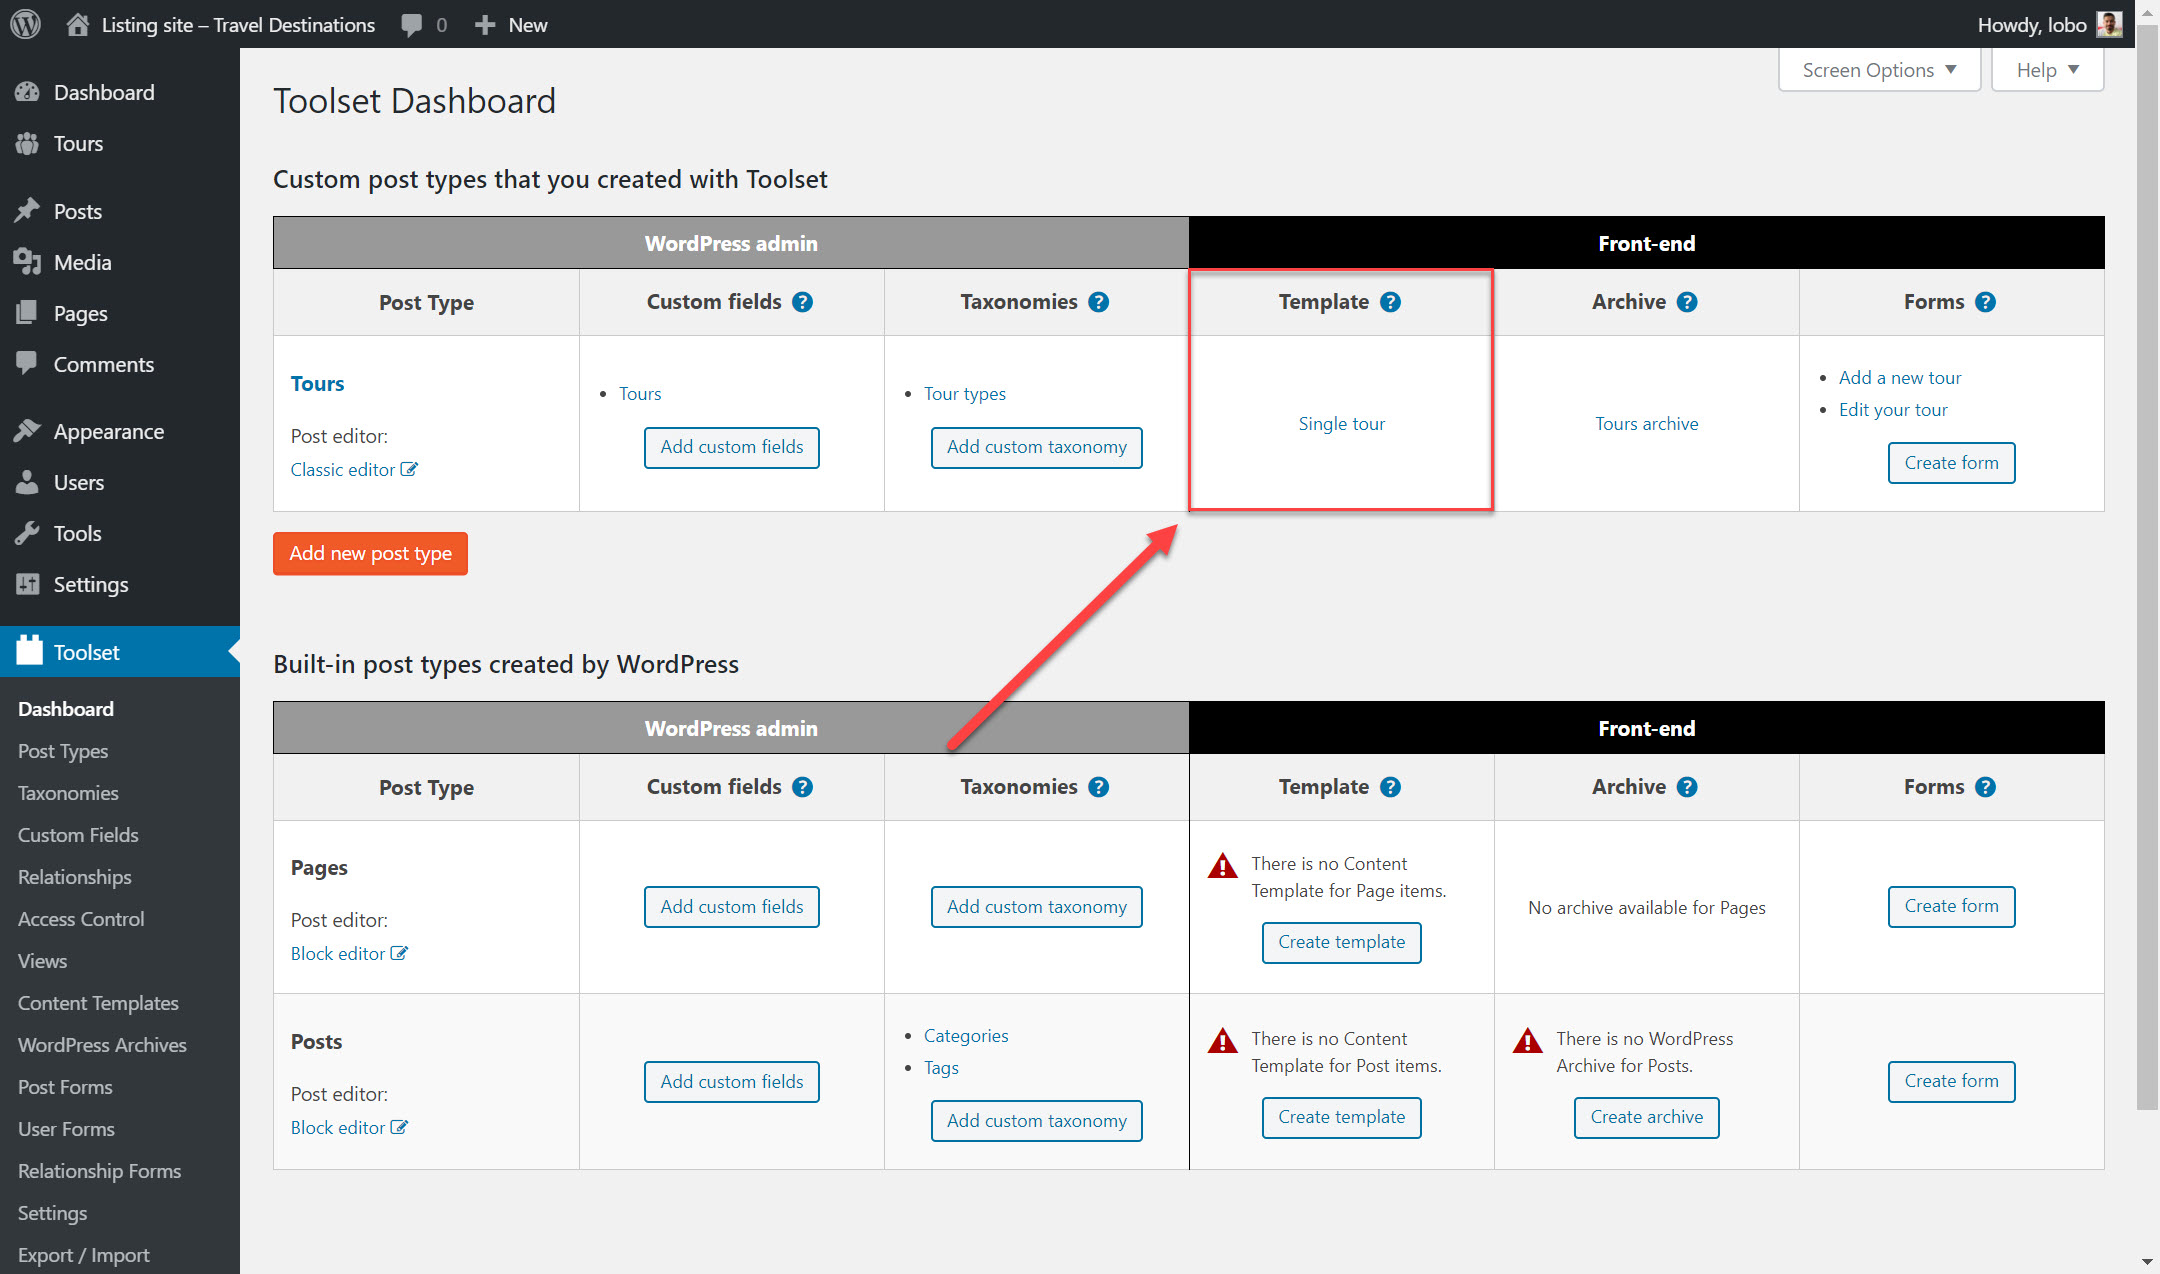
- Head to Toolset->Dashboard and click on Create Content Template next to the post type. Below, I have clicked on the option next to the tours custom post type.
- Next, you can add the fields you want for your template. For example, I have added the Heading, Image and Single Fields blocks to display my content. Click the + option in the top left.
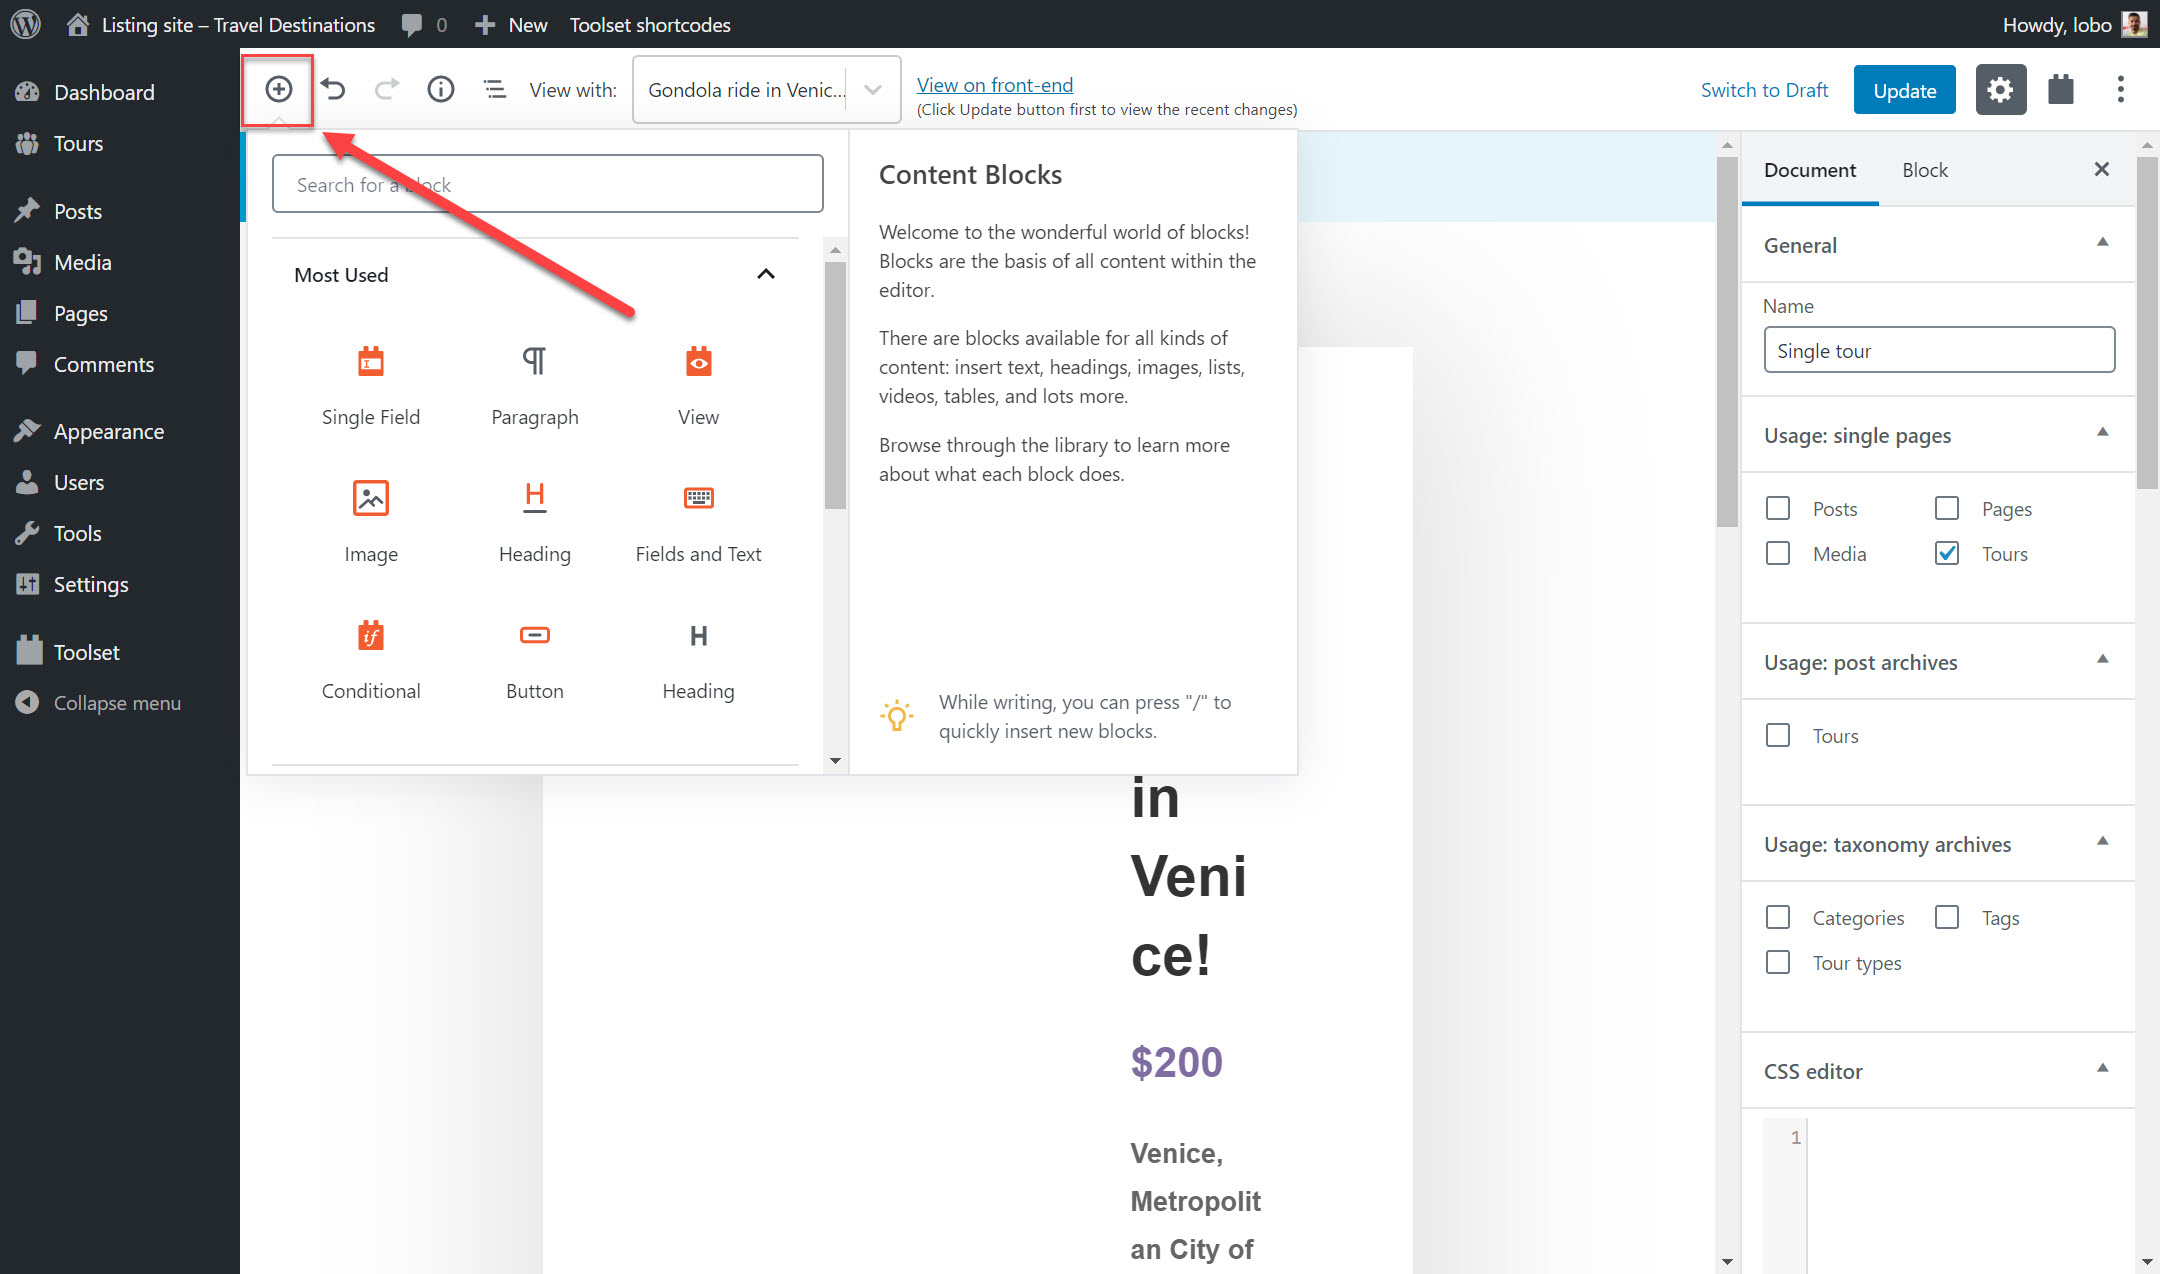
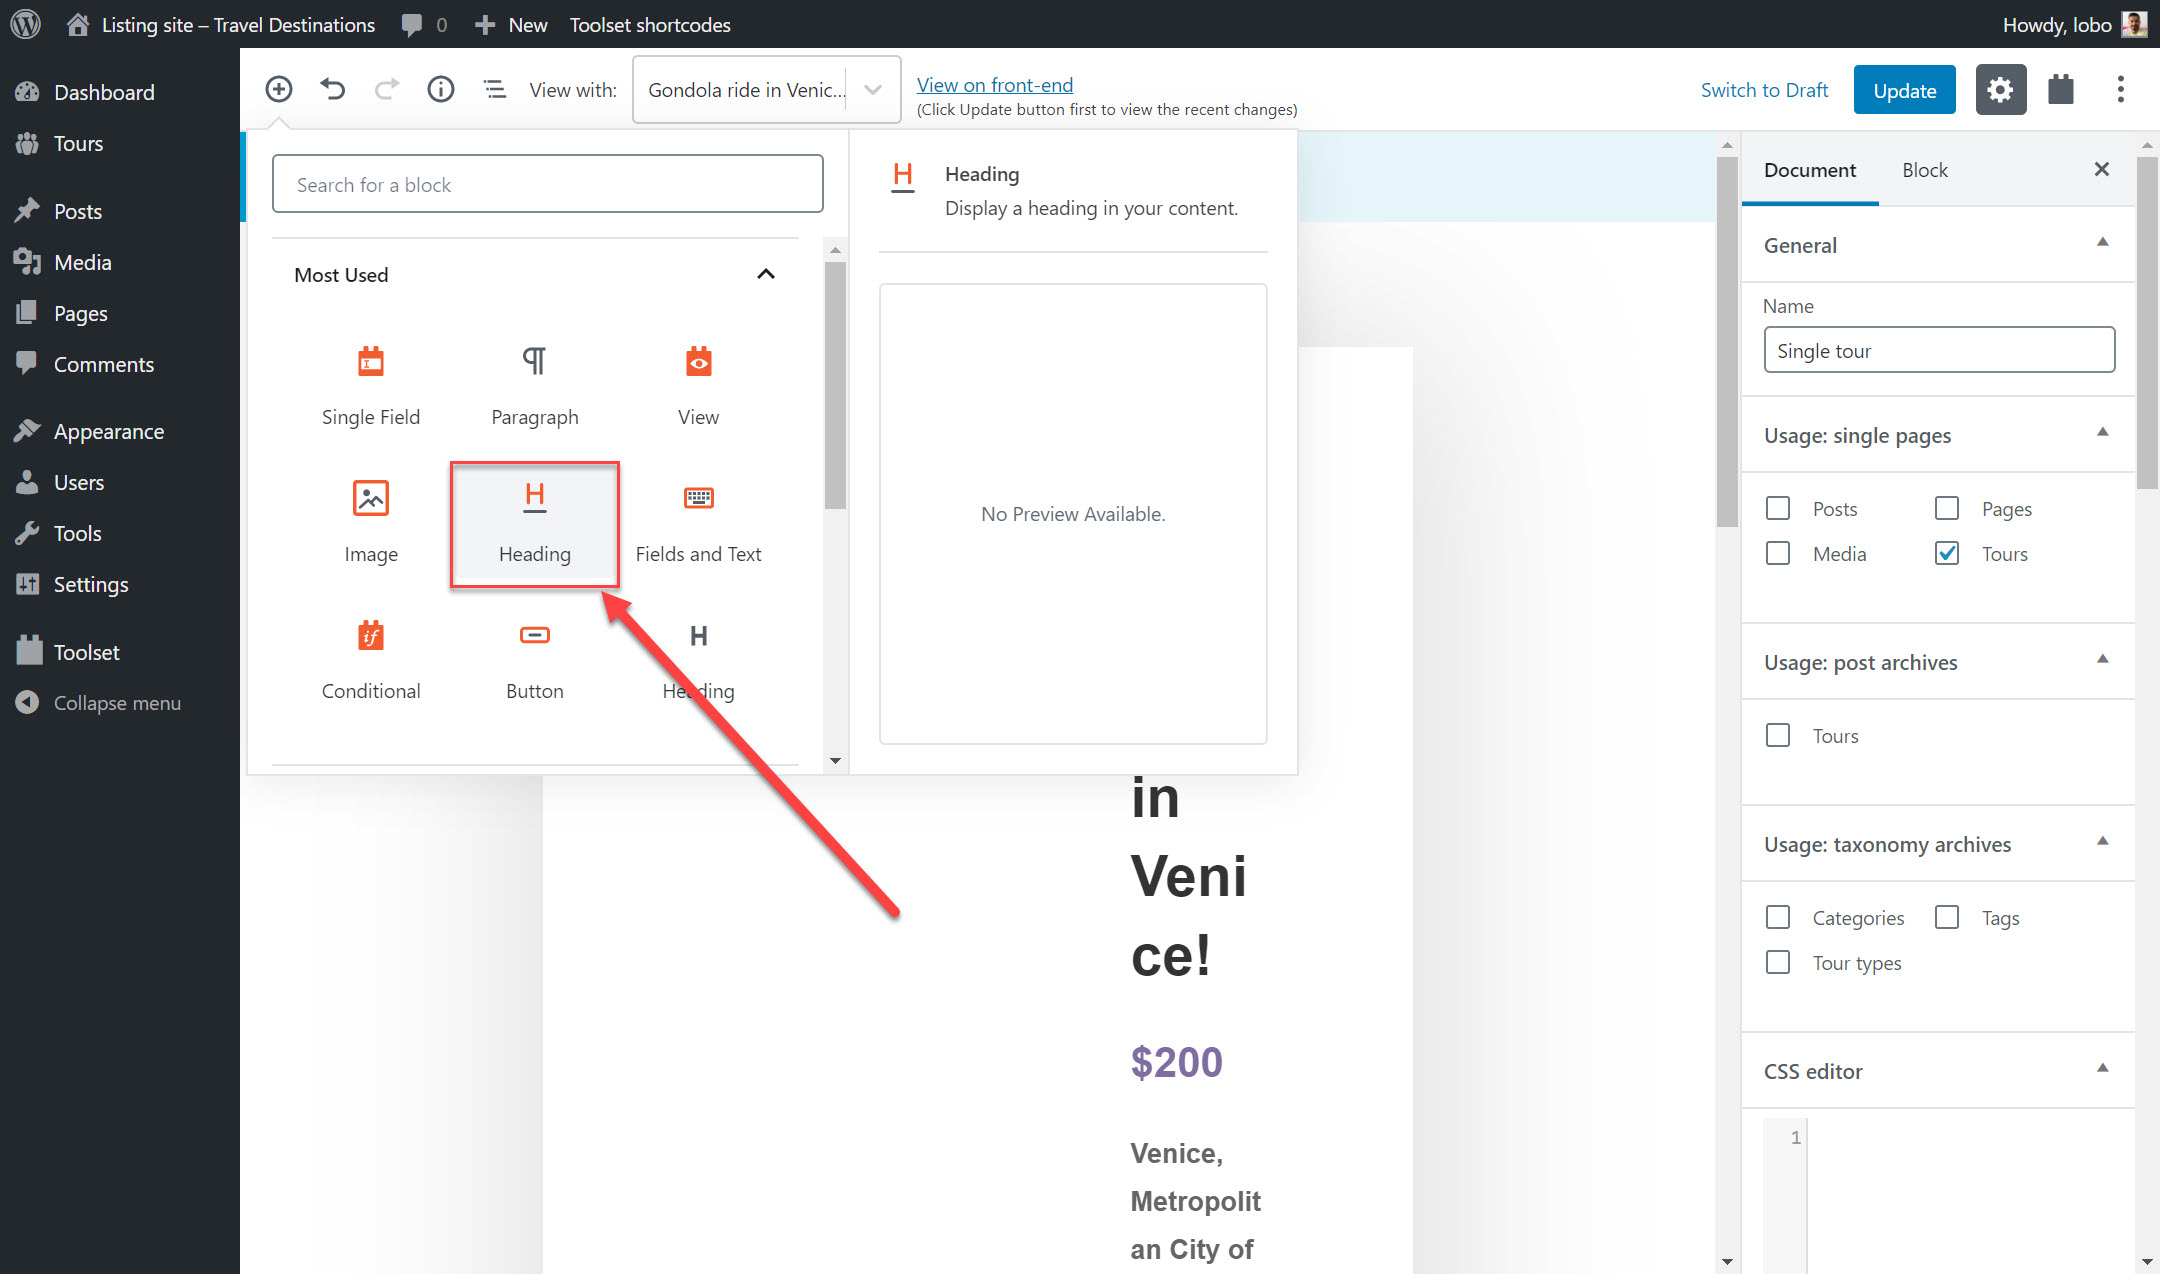
- Click under the Toolset section and search for the block you want to add. For example, I have chosen the Toolset Heading block.
- Toolset allows you to make your blocks dynamic in order to pull the correct content from the database. For this block click Dynamic Heading Text.
- Under Source select the Post Title.
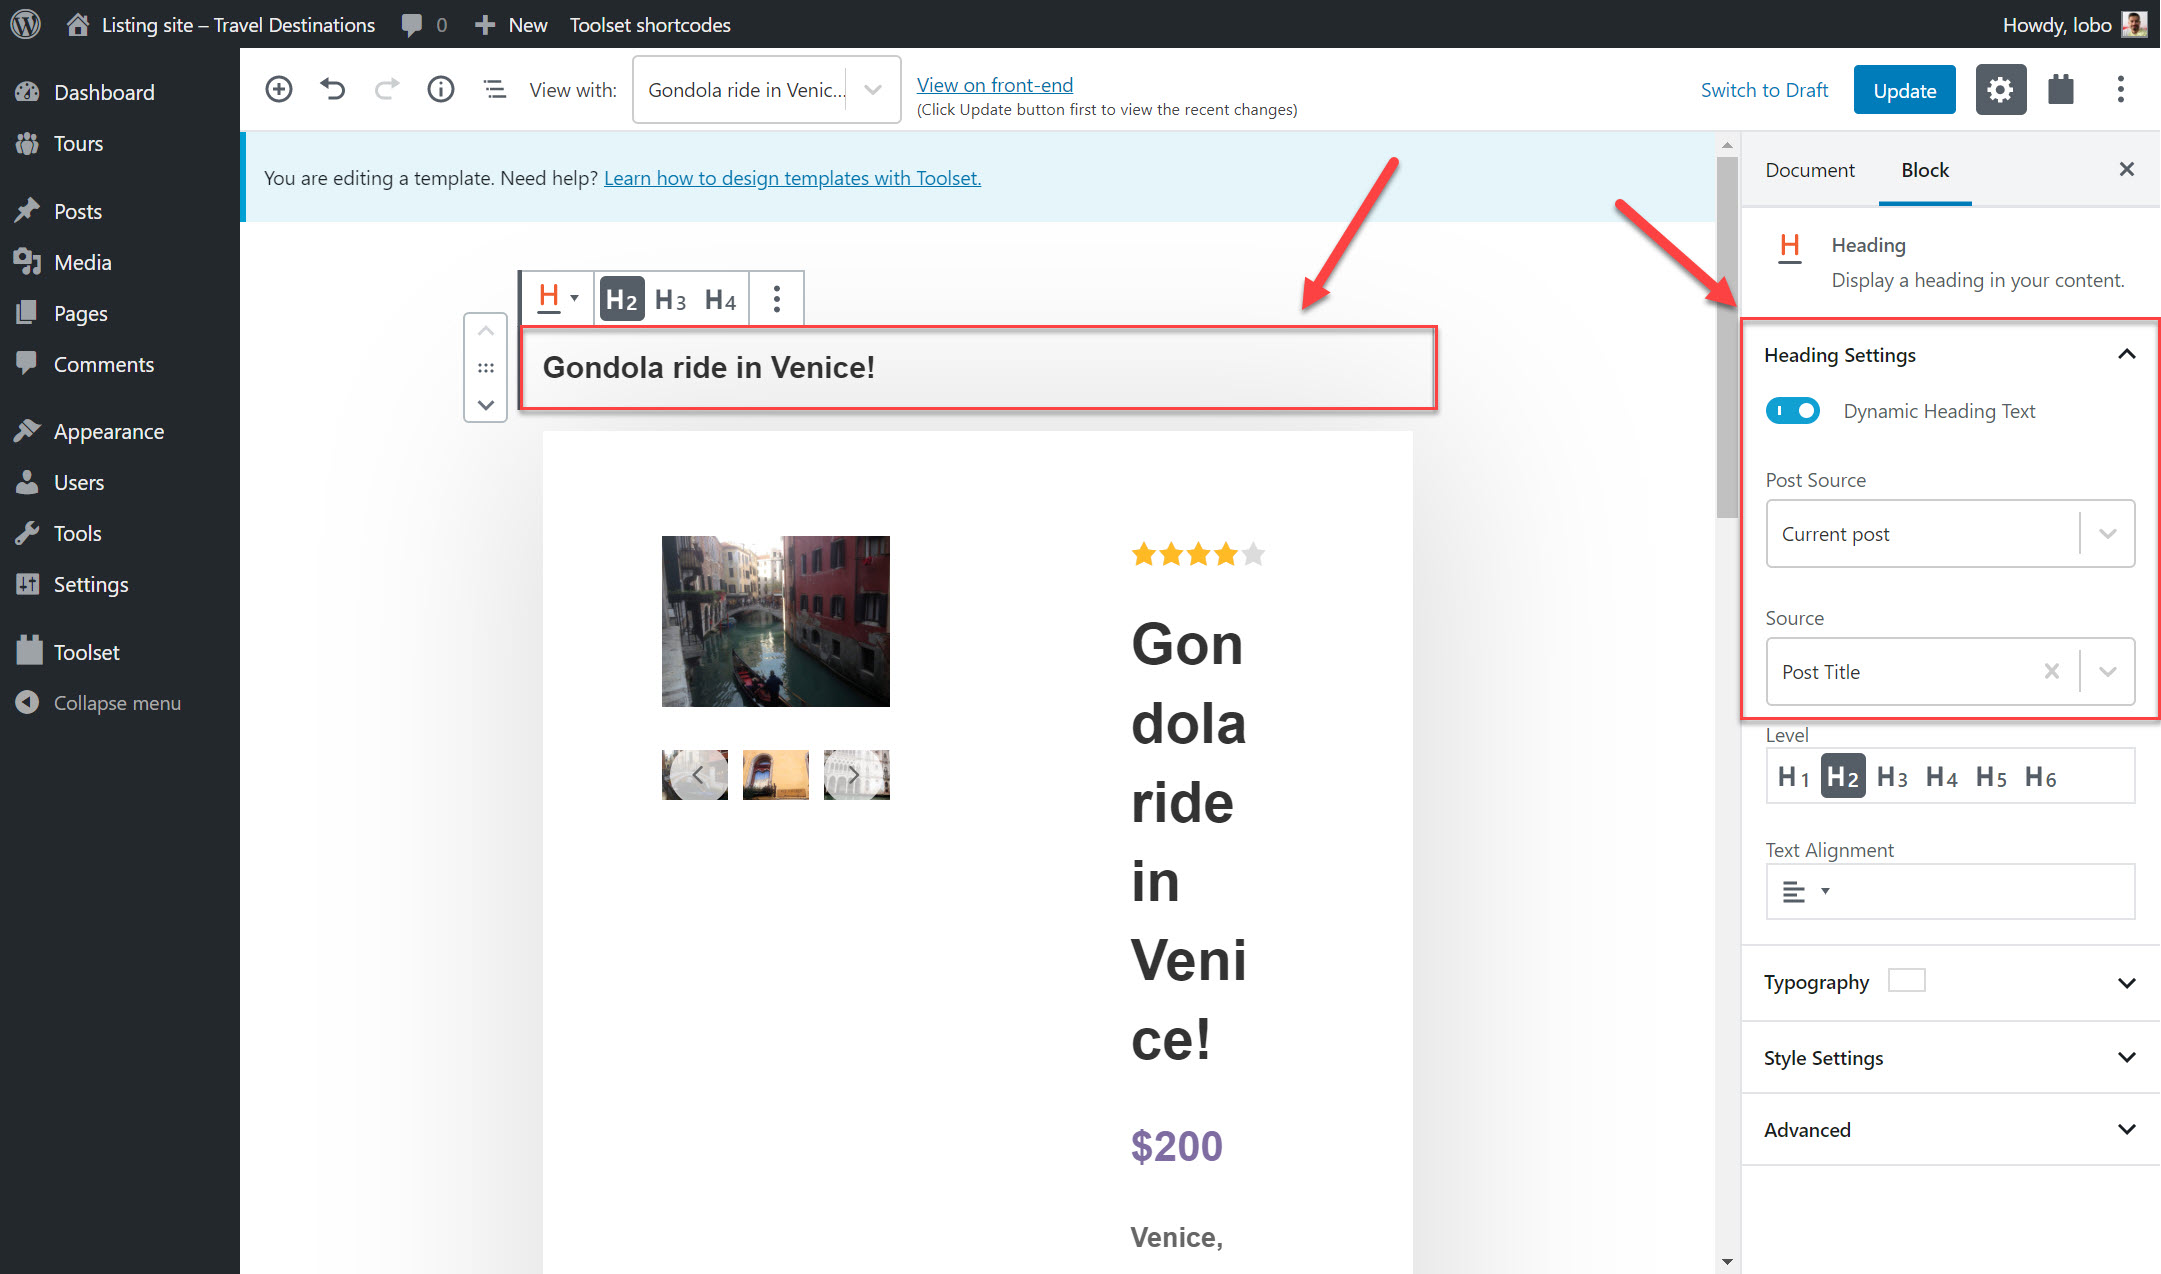
- Follow the same steps to create your other blocks including the Image and Single Field blocks.
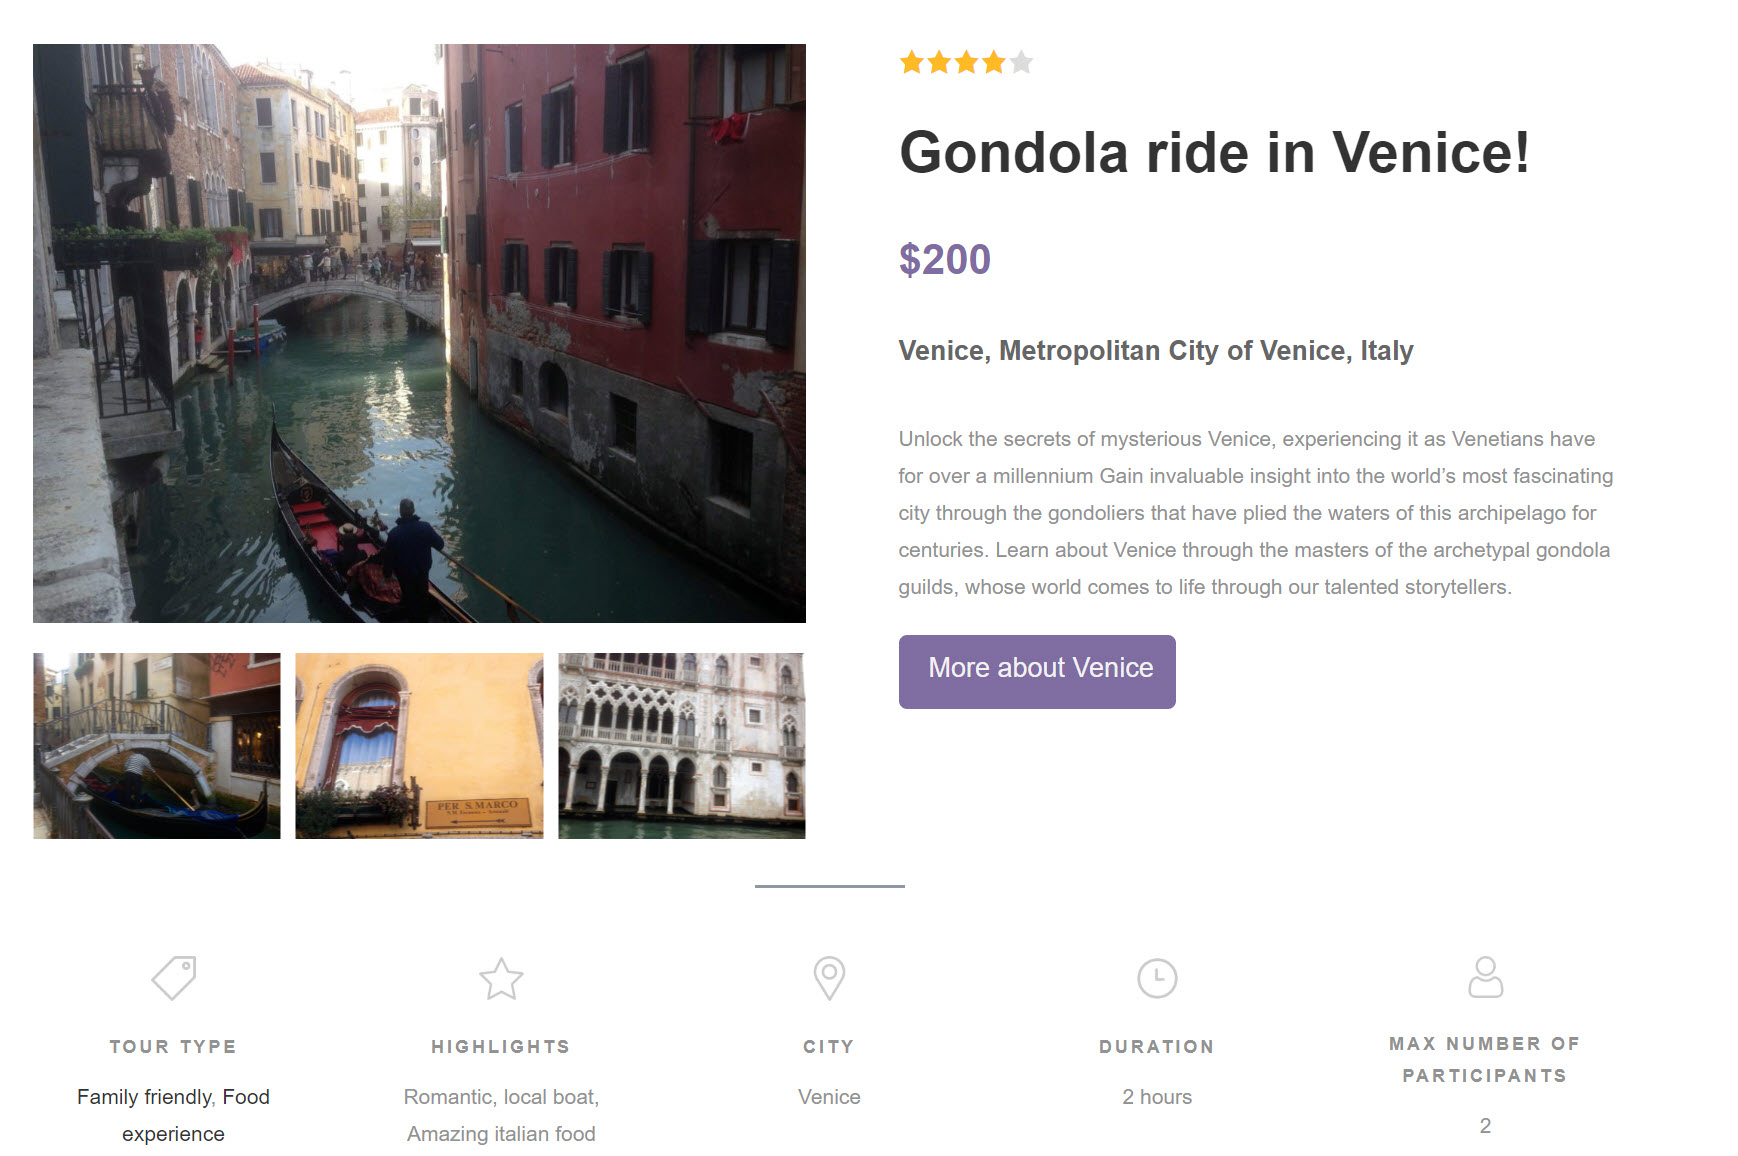
- Once you have added your blocks you can see how each of your tours posts looks on the front-end. With different content but the same template.
Build your archive pages
An archive page displays a list of the content you have published under a custom post type. For example, you can create an archive that shows all of the blog posts you have published or all of the gyms on your website.
However, you can also customize how your archive pages look and which posts they display using Gutenberg and Toolset. For example, you can choose to only display blog posts from the last 30 days which are on a certain topic.
Below is how I created an archive for my "Tours" custom post type.
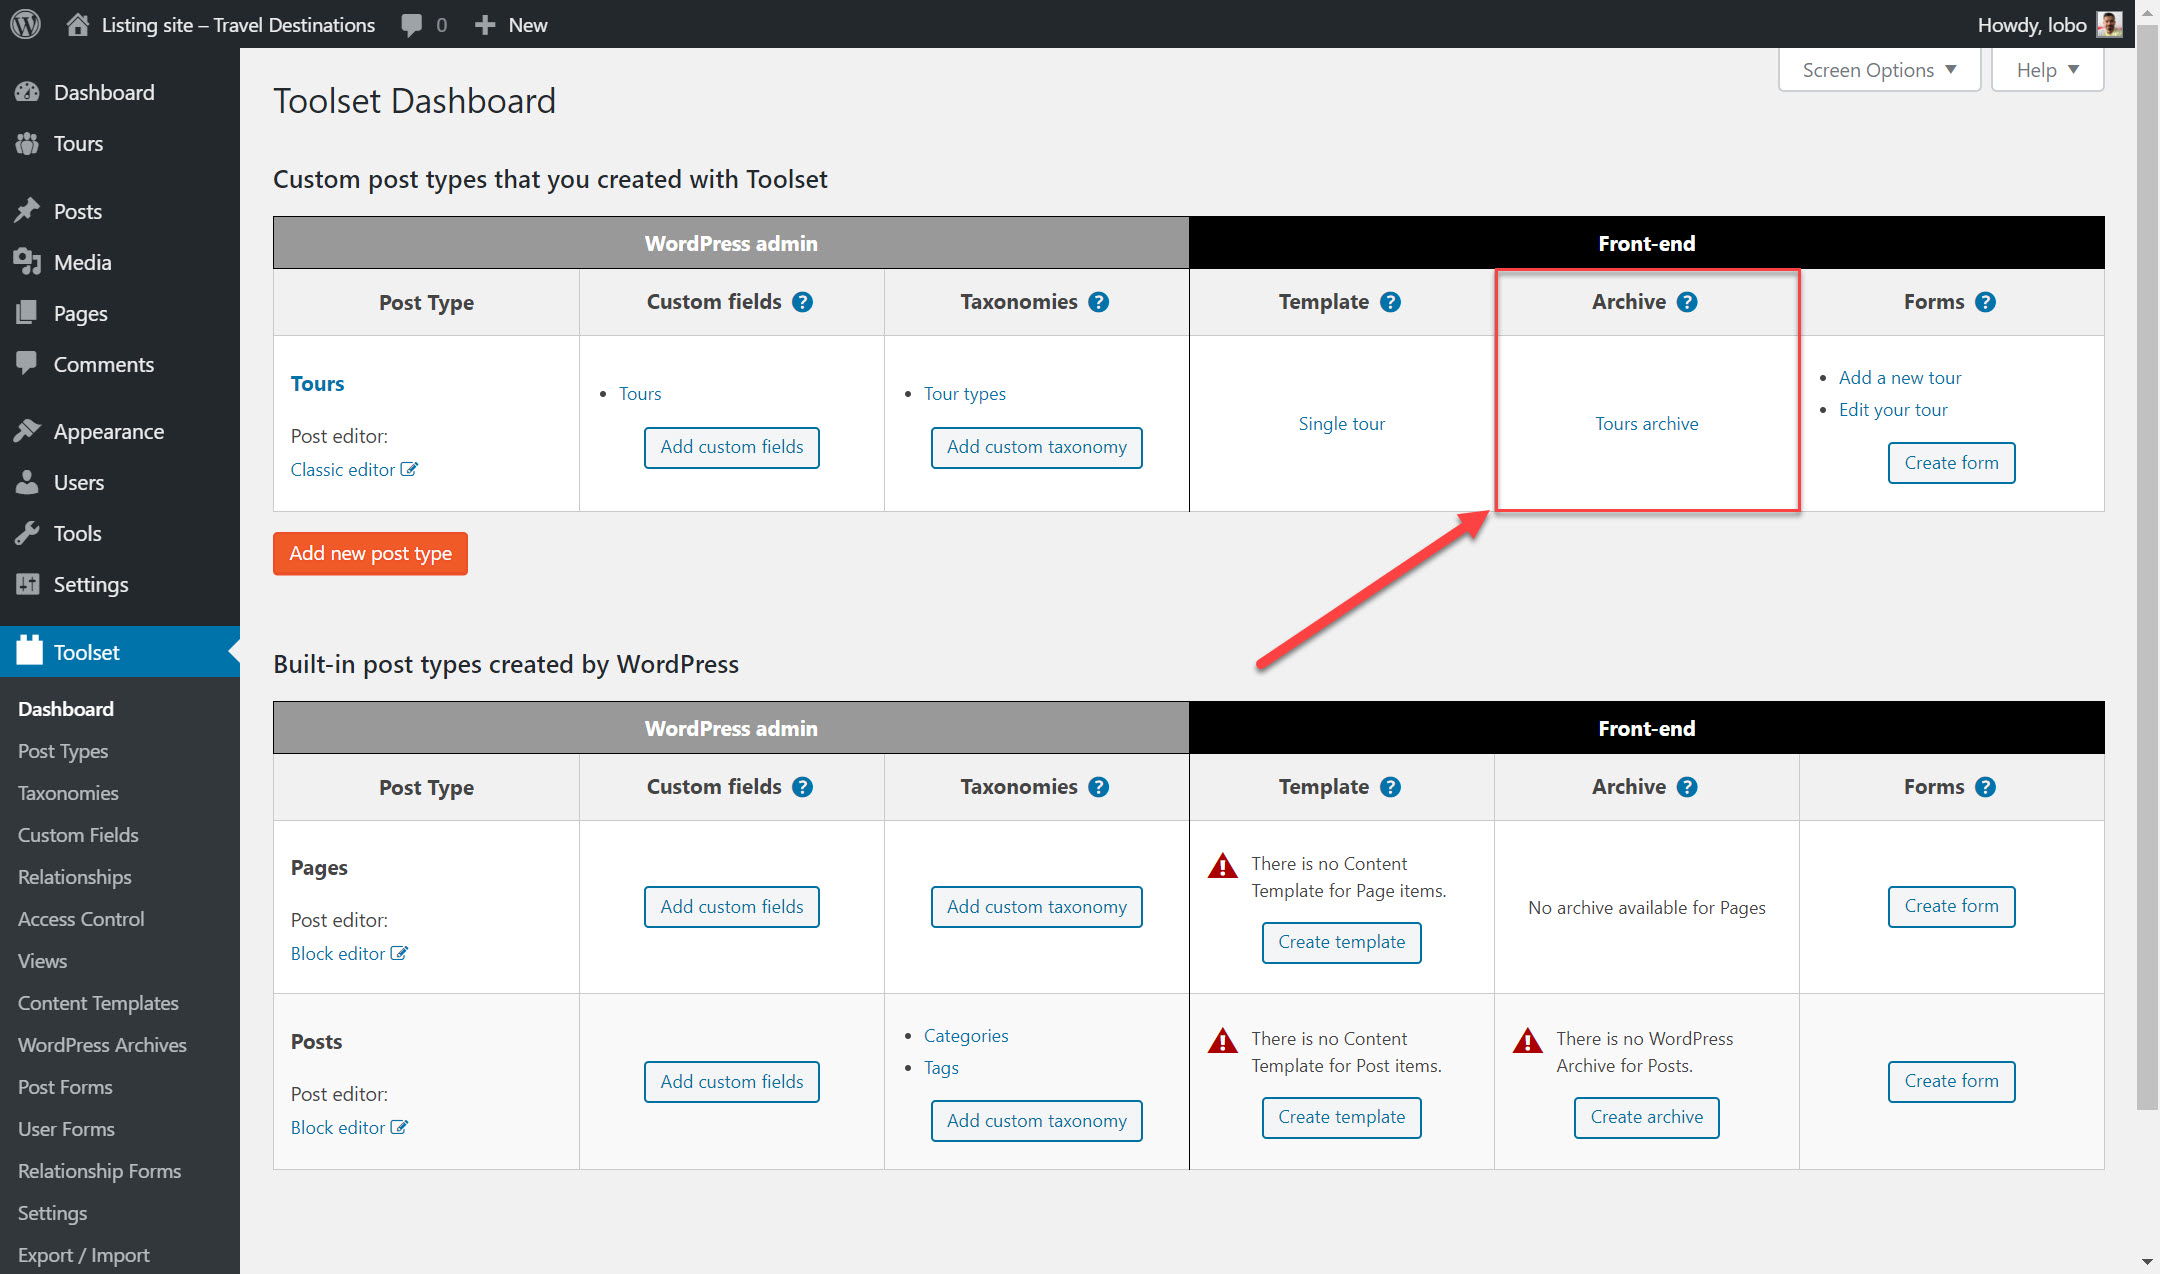
- Head to Toolset->Dashboard and click on the Create Archive option next to the custom post type. To illustrate, I have selected to create an archive for my "Gyms" custom post type.
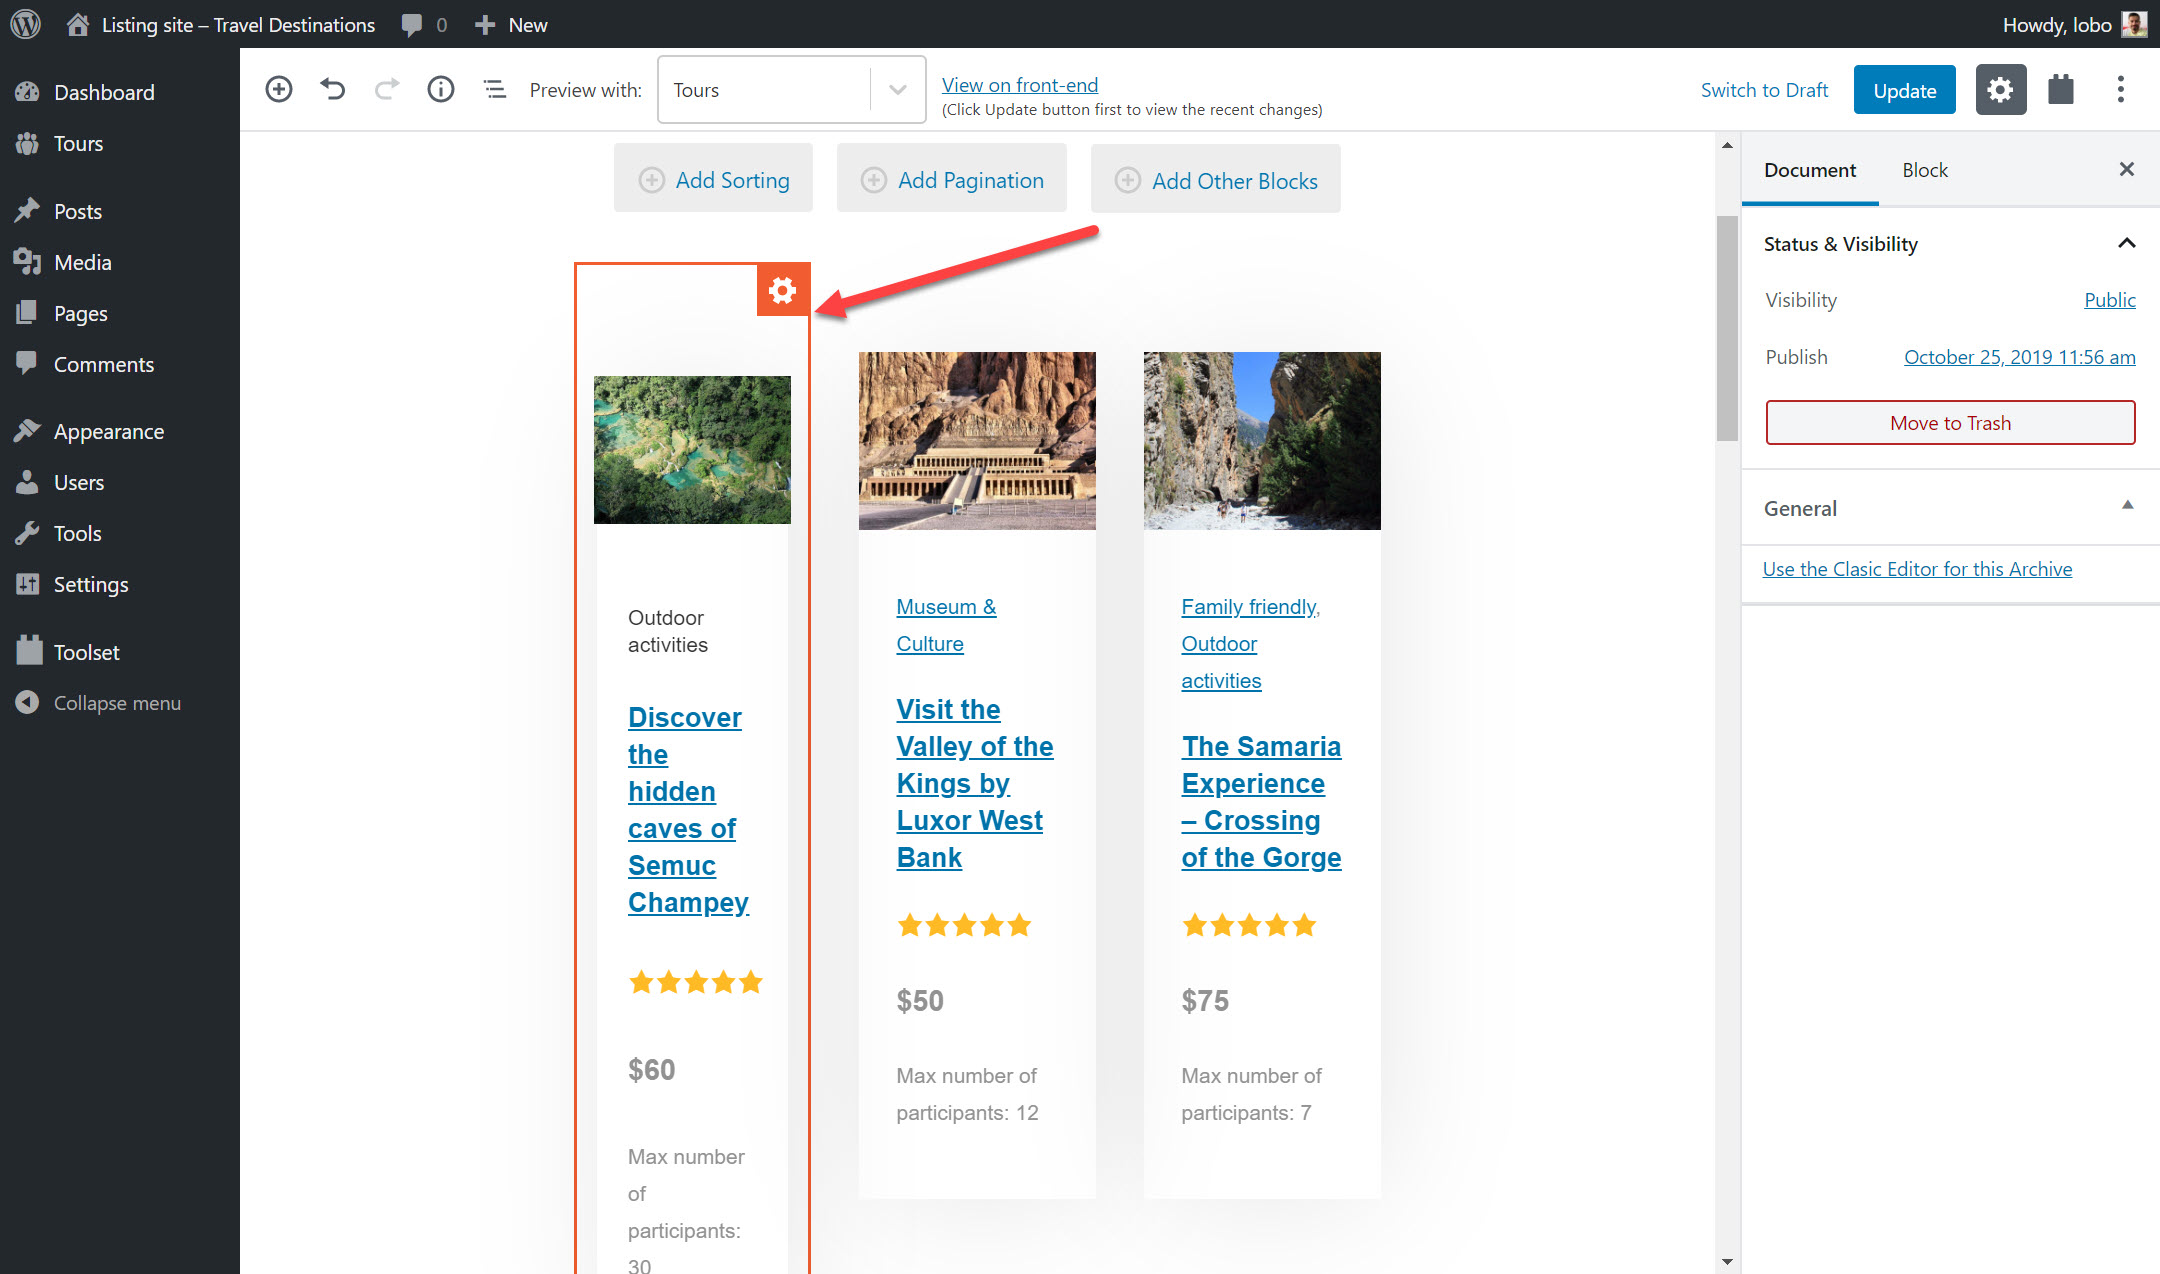
- Just like we did for our content template we can add the blocks we need for each post along with dynamic content so that WordPress pulls up the correct content from the database.
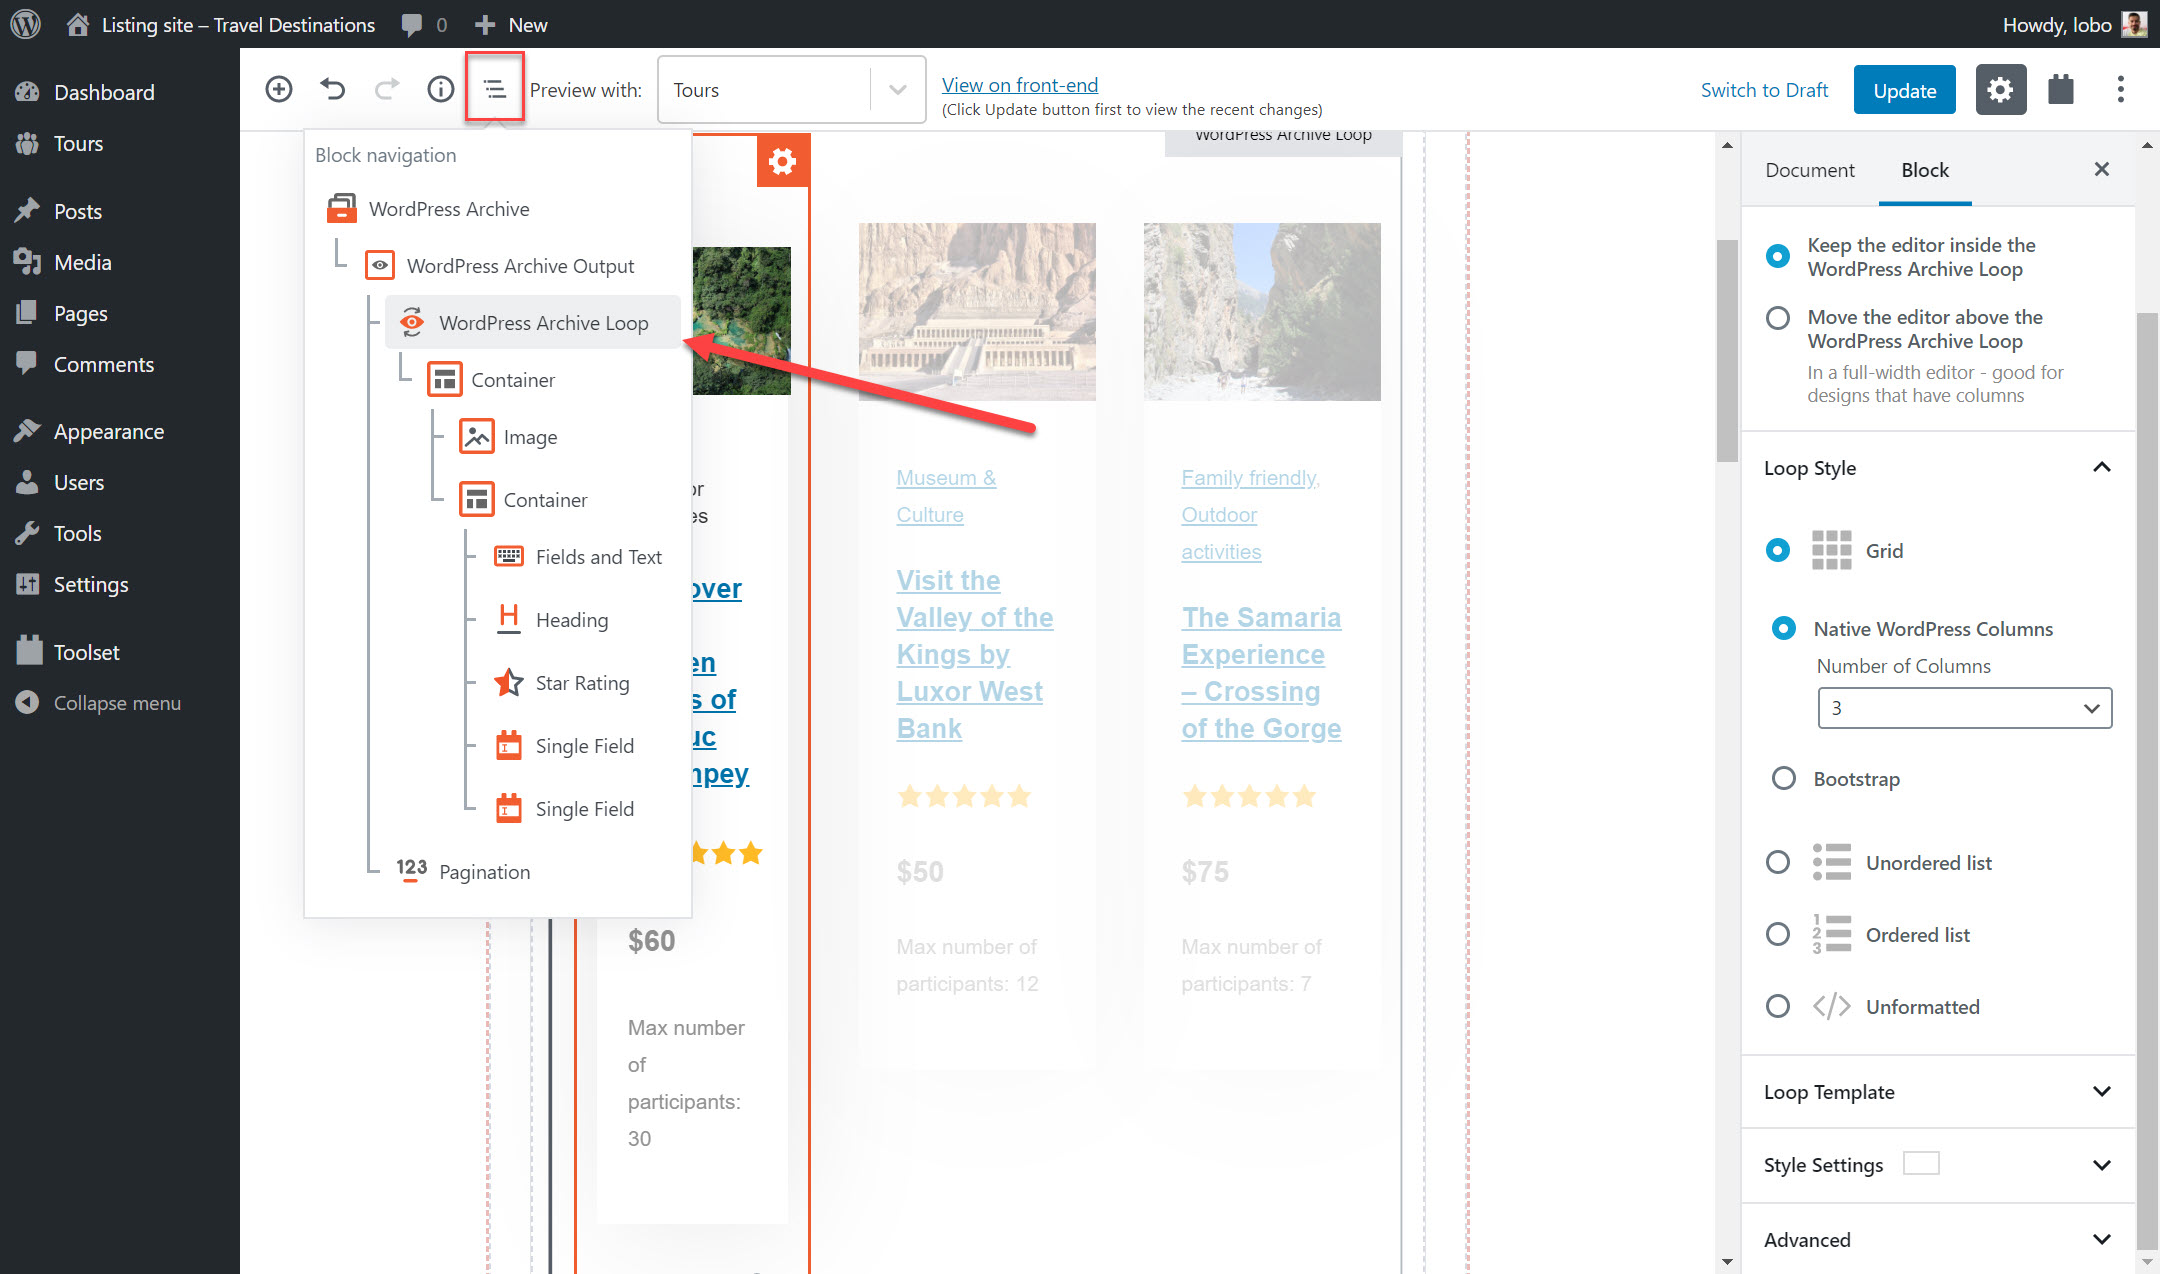
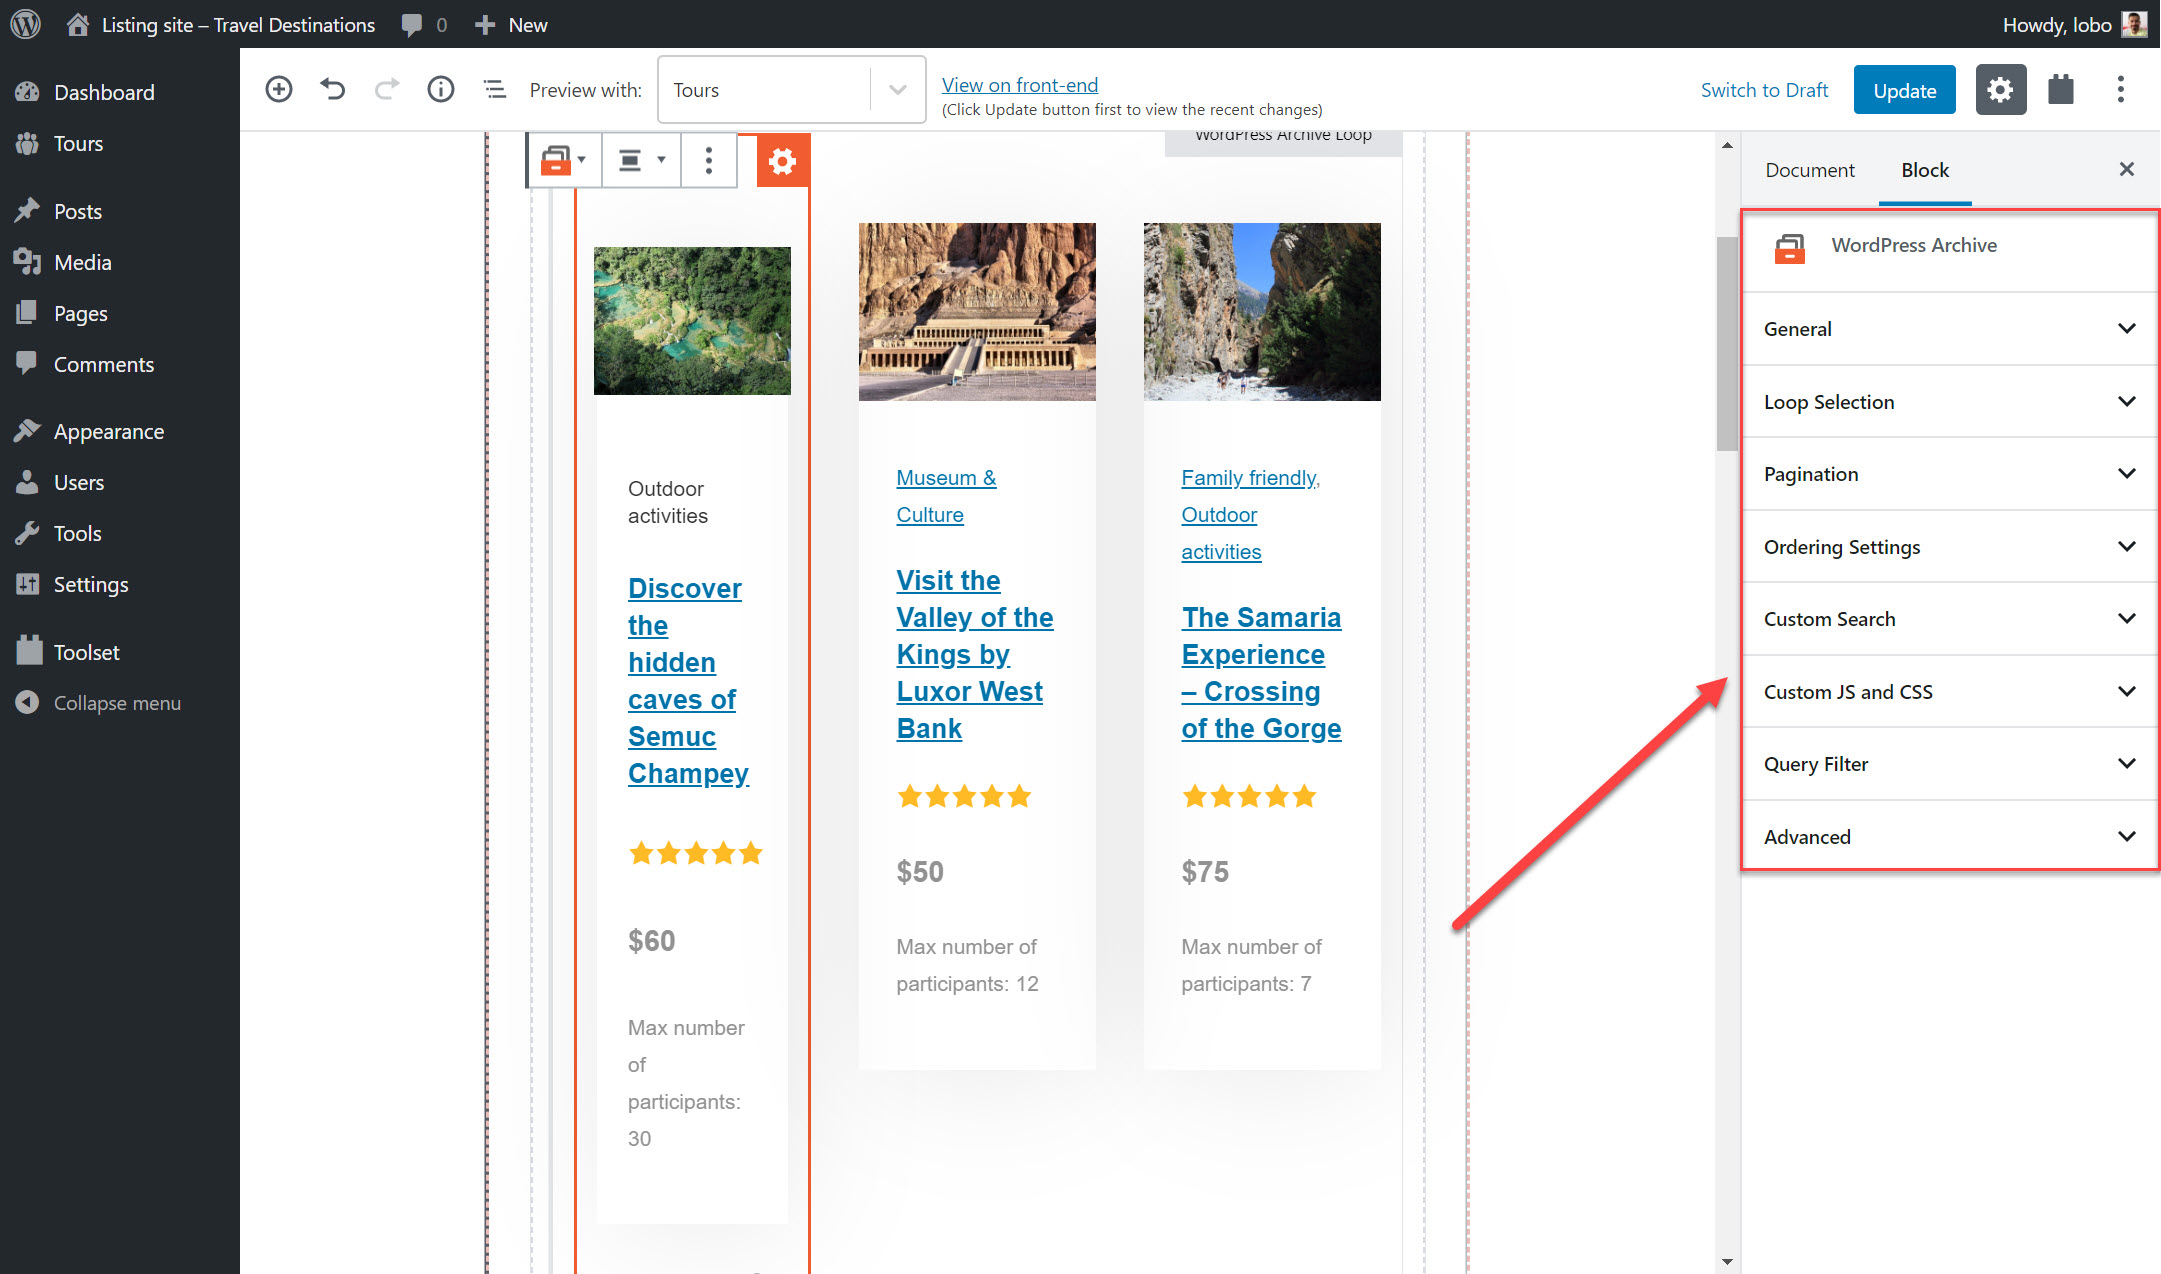
- Once you have added your blocks you can also change your archive's layout such as the number of columns by selecting the Block Navigation and then the WordPress Archive Loop.
- Under Loop style you can toggle the number of columns and also change the layout style of the posts (if you want an unordered list or for it to be unformatted, for example).
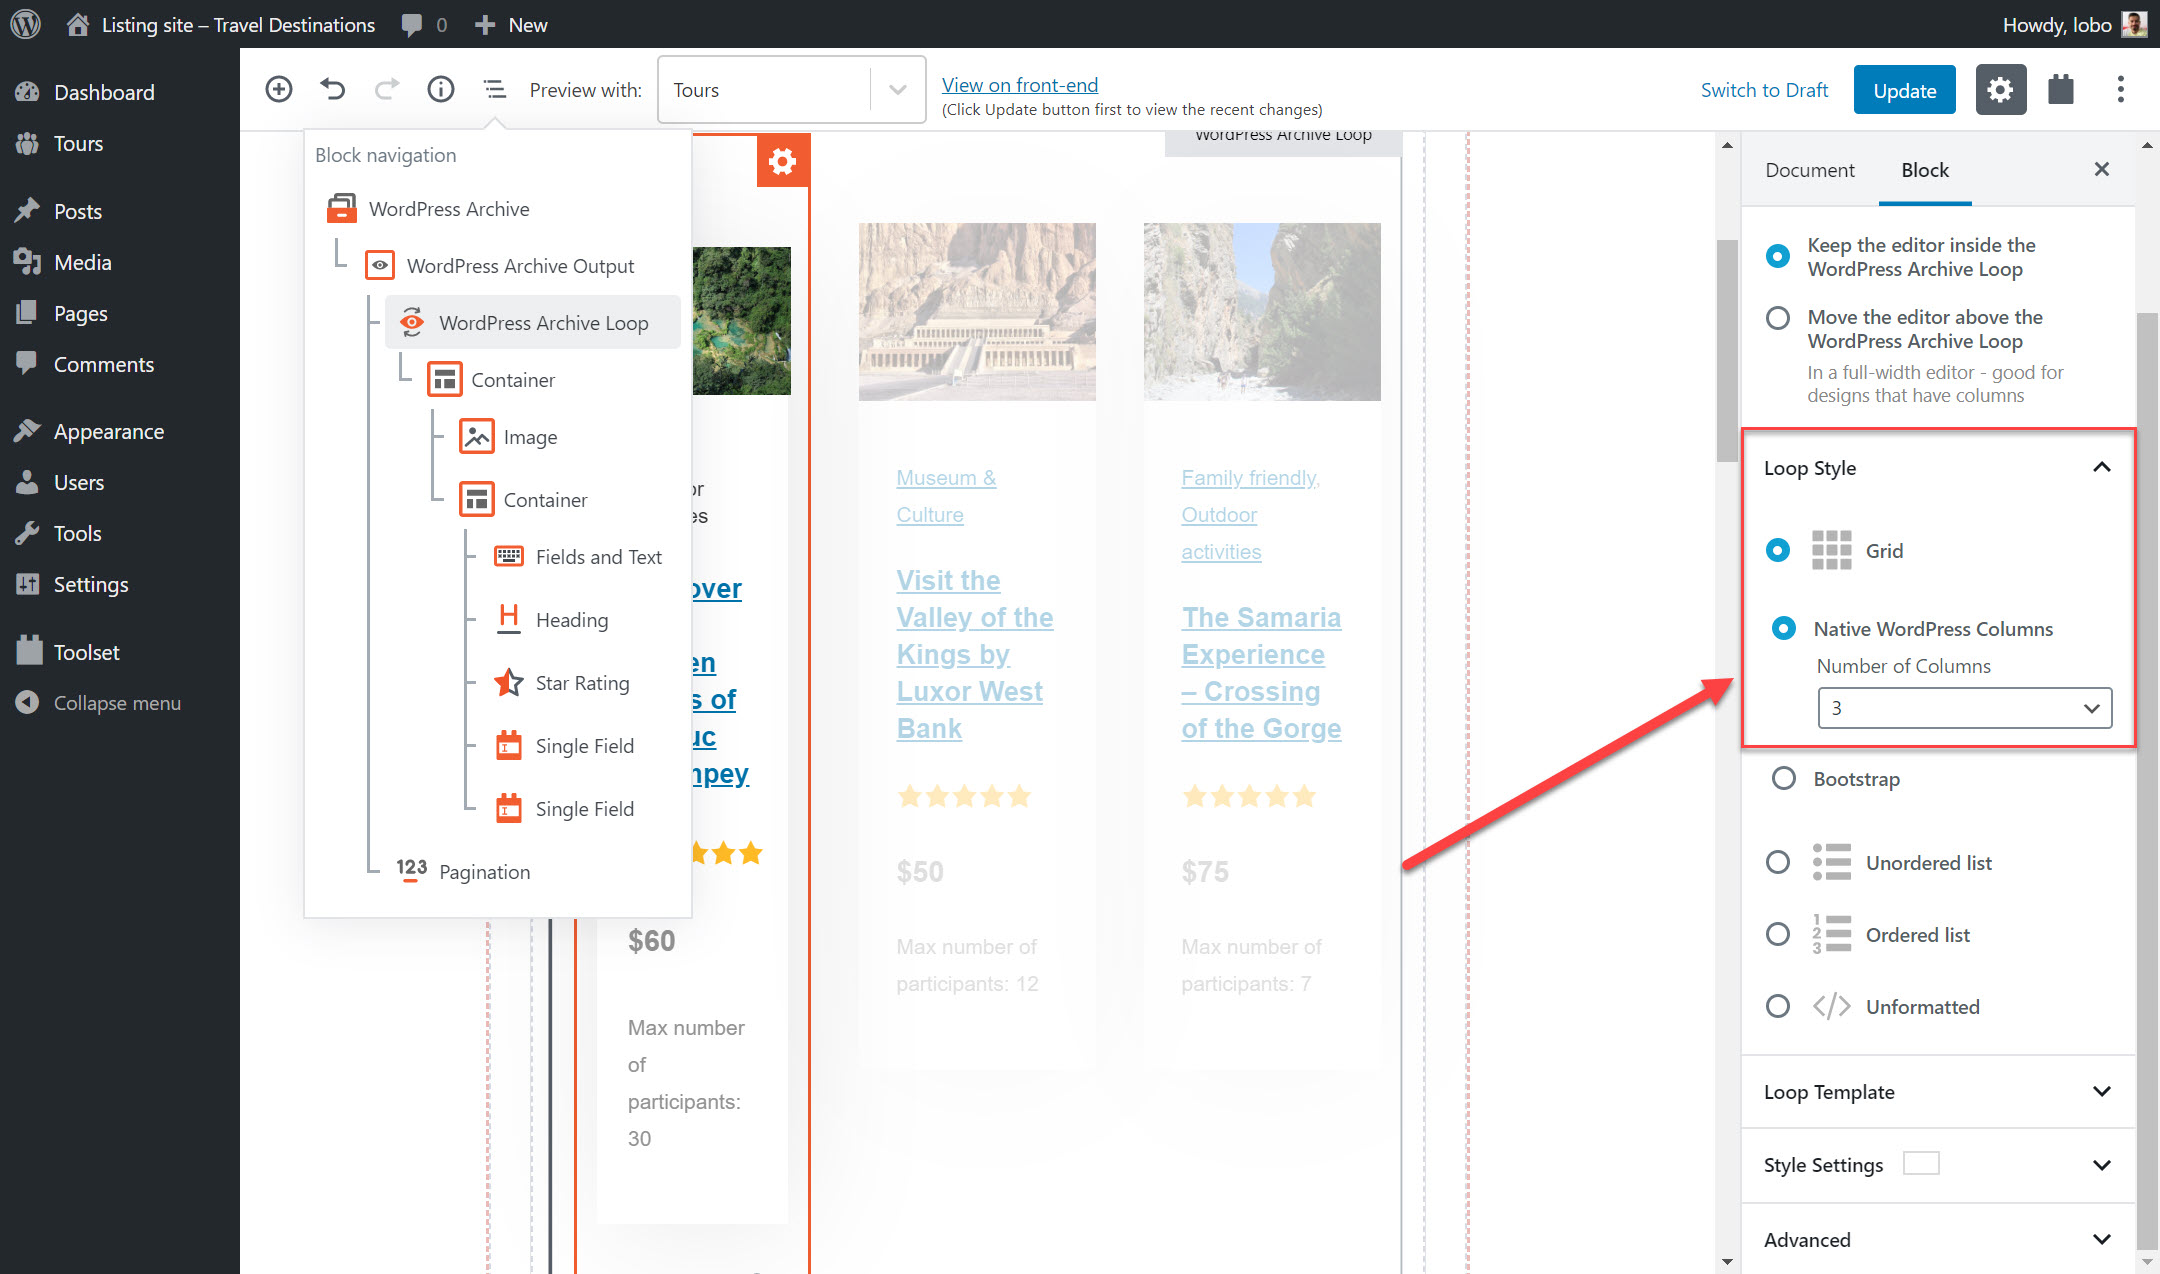
- You can change all aspects of your layout including the order of posts, the pagination as well as columns on the right sidebar under the WordPress Archive block.
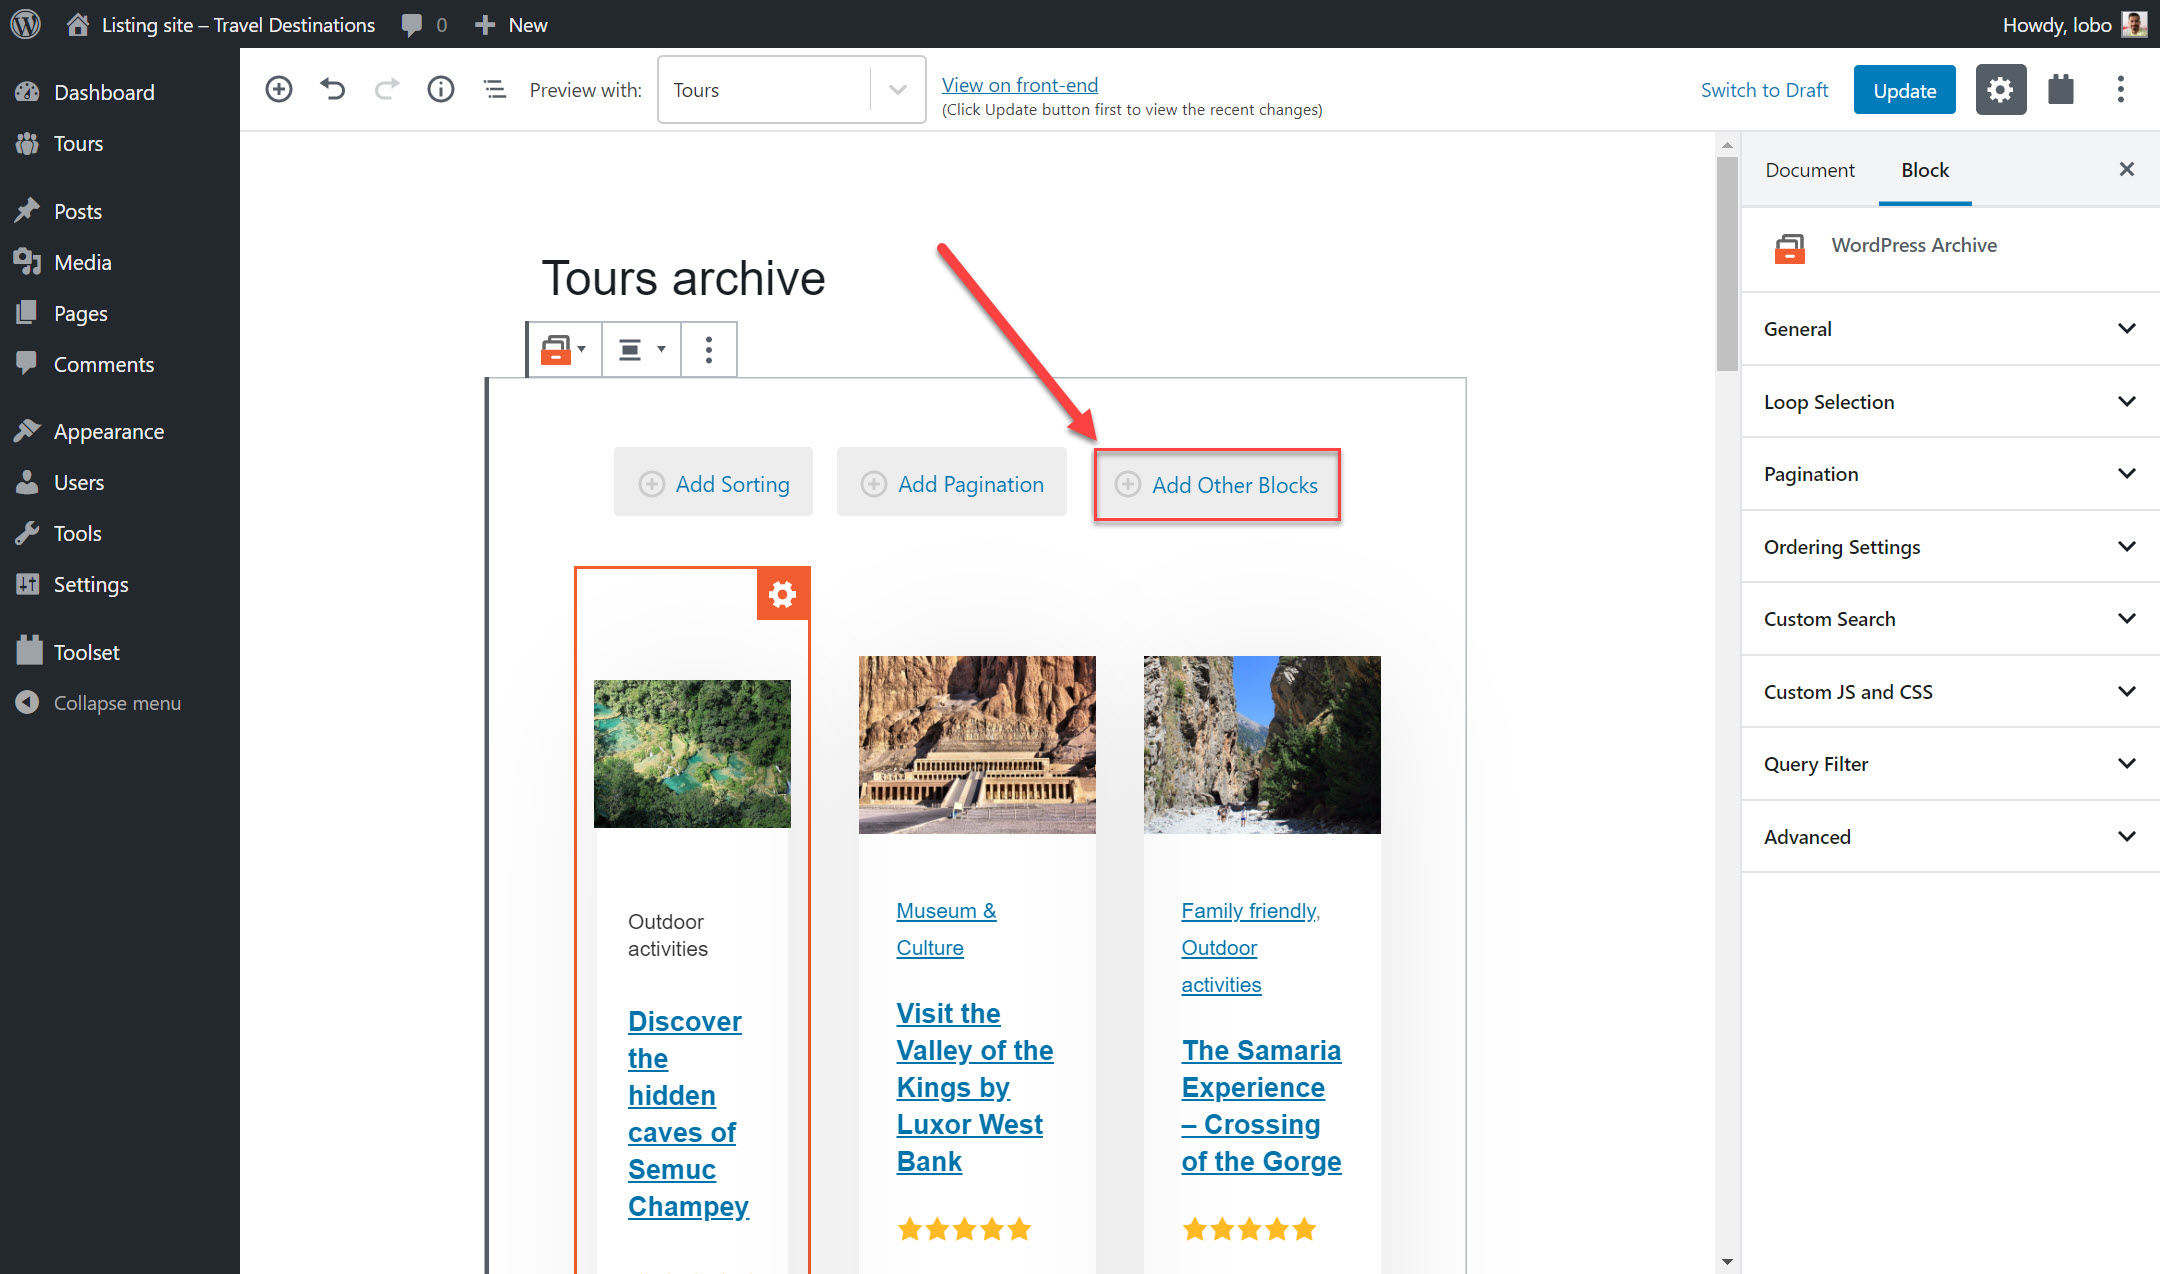
- You can also add texts and blocks both before and after your archive loop to provide further context about your posts. Simply click the + icon before or after and you can start adding blocks or texts.
Display custom lists of content
With Gutenberg and blocks such as Toolset you can display a filtered list of your content and order it in any way you like. You can design your lists in any way you like including as a table, grid or any other custom design. Toolset calls this type of list a View.
For example, you can create a grid of the tours which cost less than $200 a month which are available in the next month and are ordered starting by the cheapest.
You can add your lists of content to any page you like using blocks. Below I created a list of featured tours for my homepage.
- Choose where you want to add your View and click the + button.
- Add the Views block and give it a name.
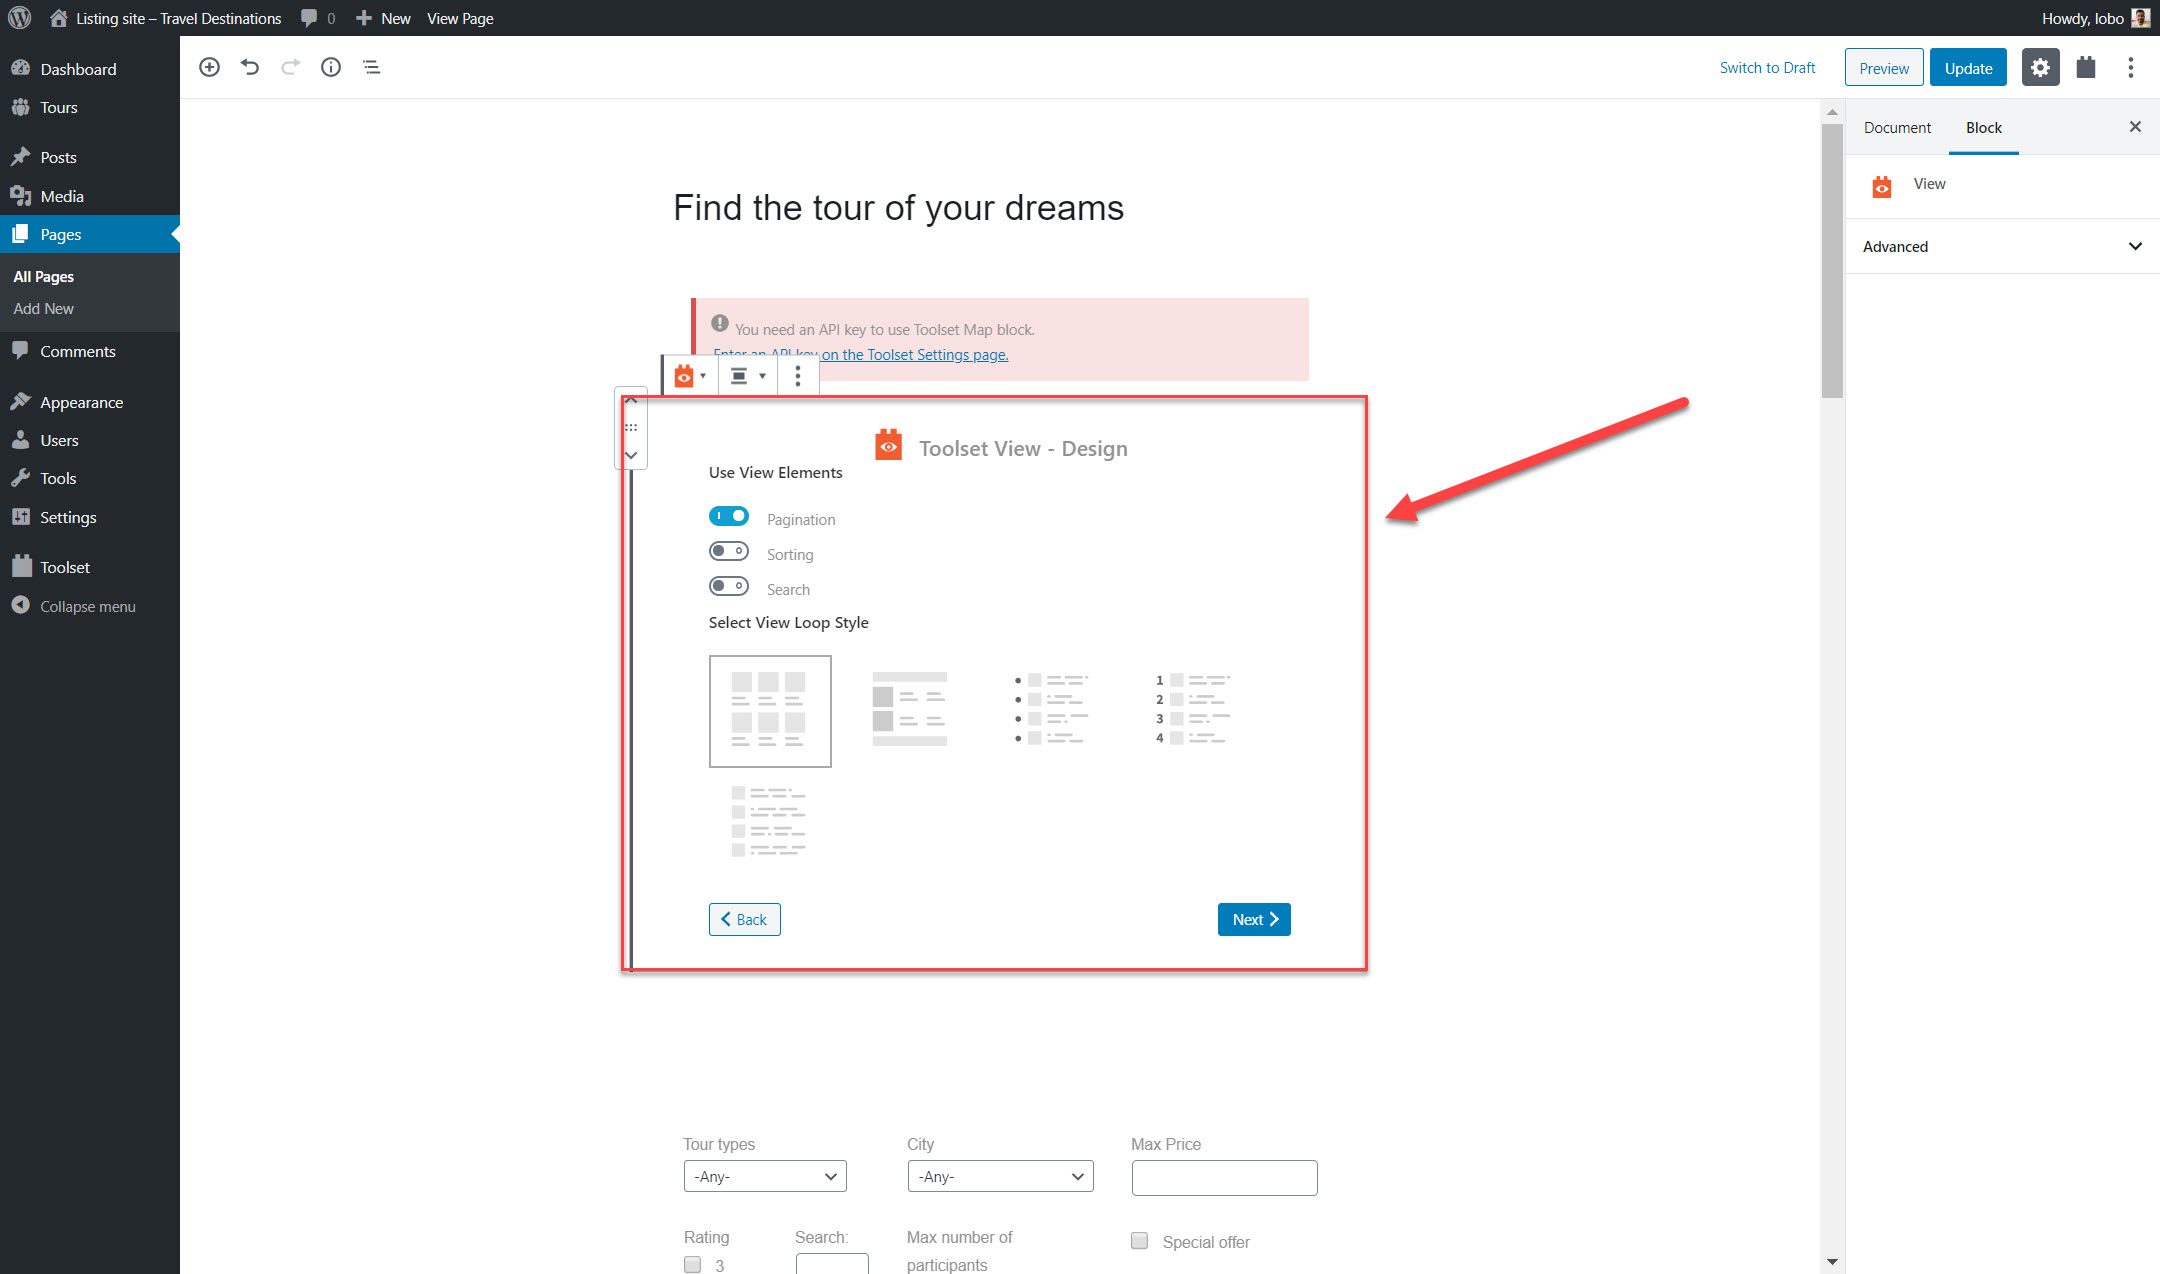
- Choose whether you want to add Pagination, Front-end sorting or a Search (we'll get to that later).
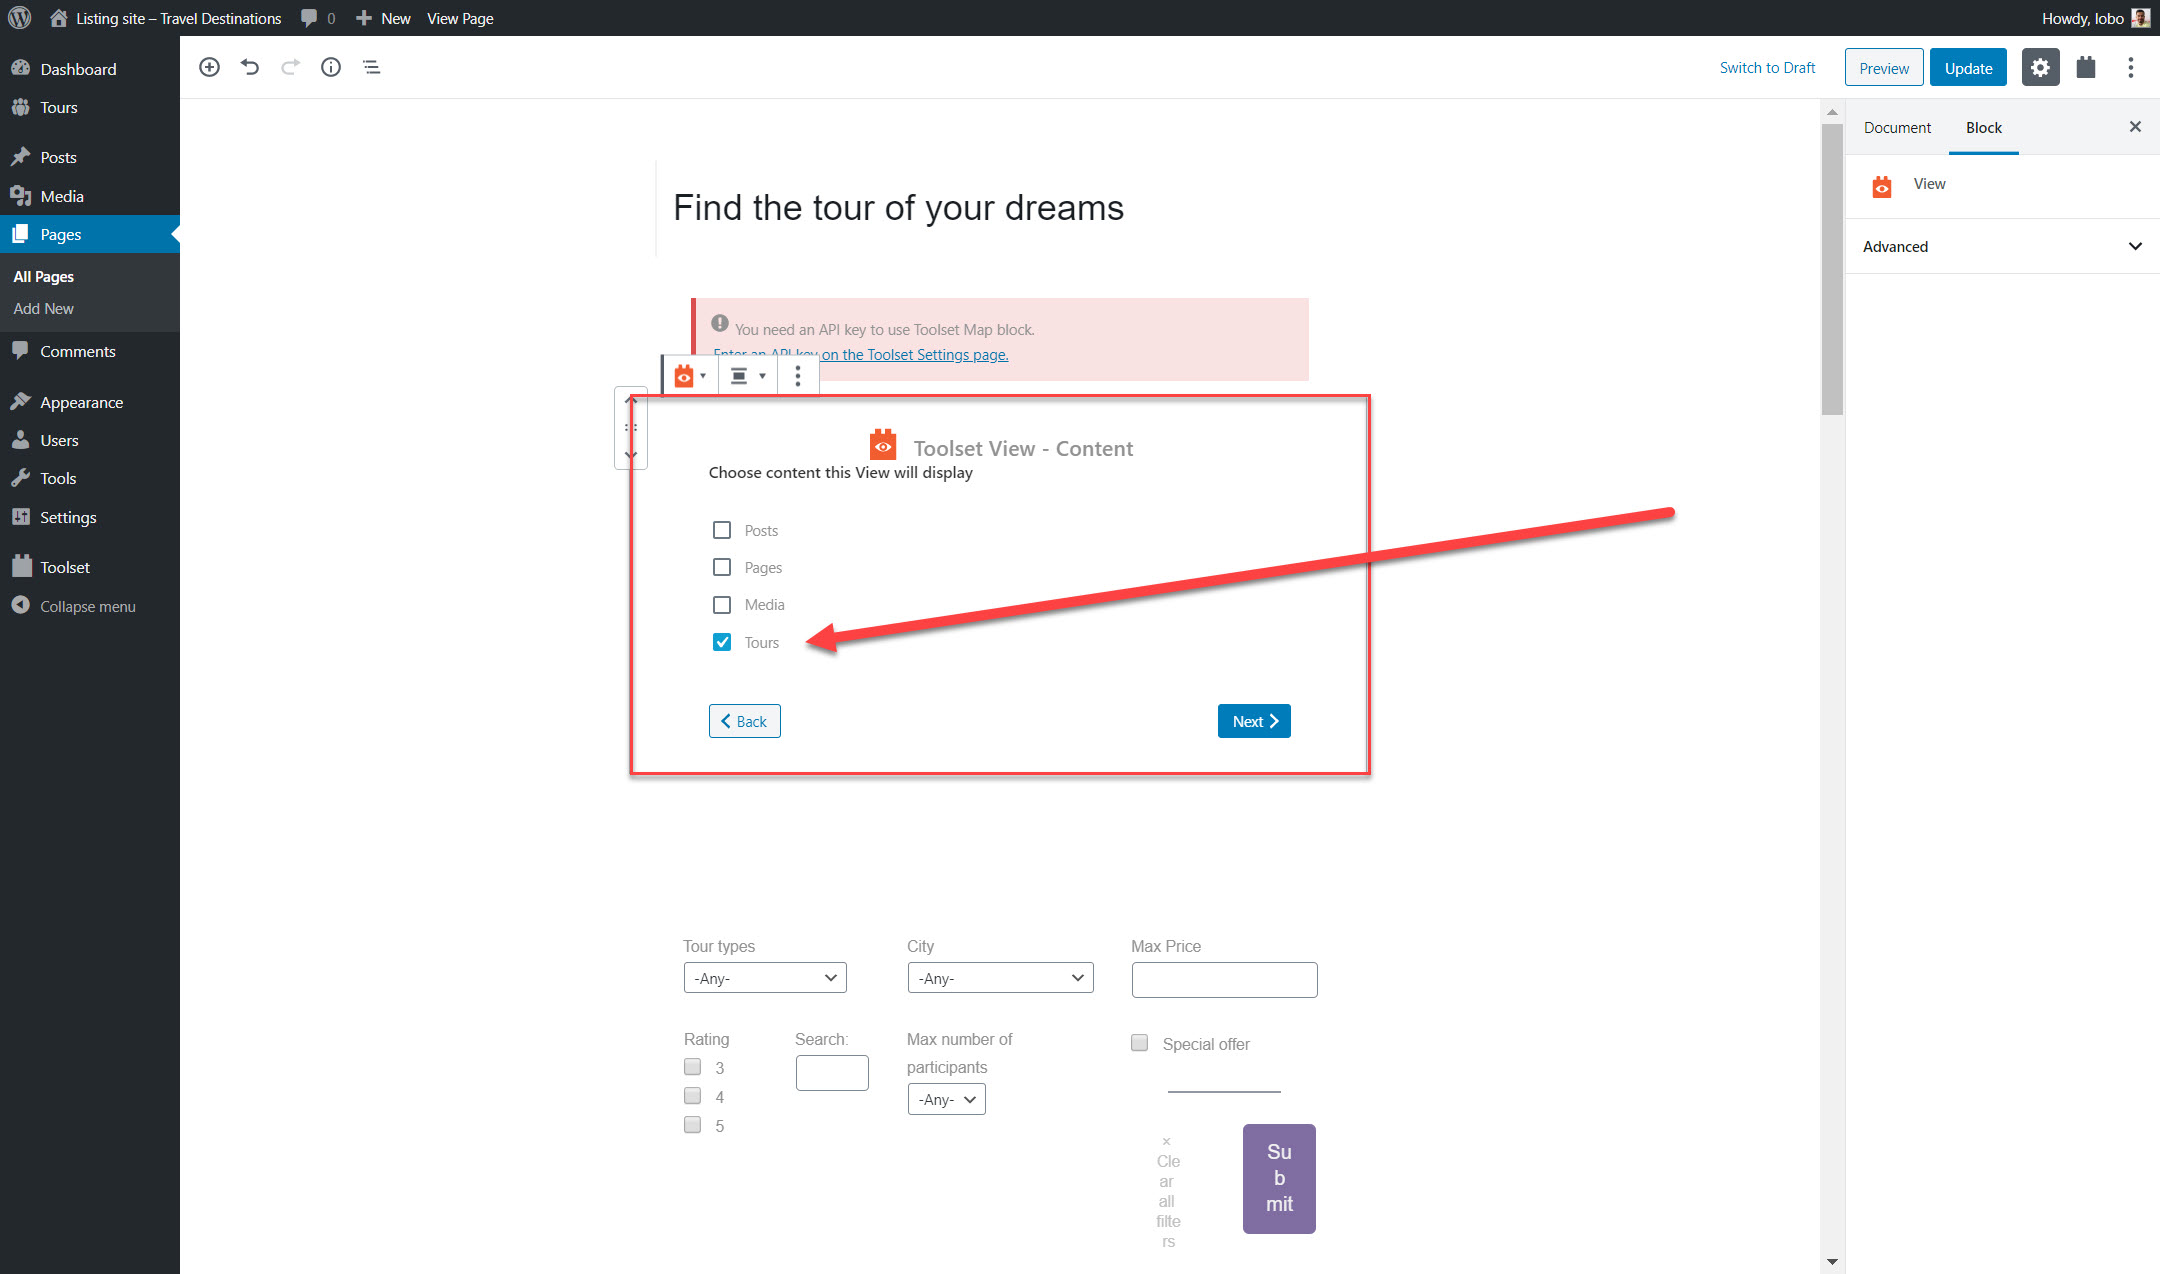
- Select which content you want to display. Below I selected the tours custom post type.
- Just like with the previous features you can next add the blocks that you want to display with dynamic content.
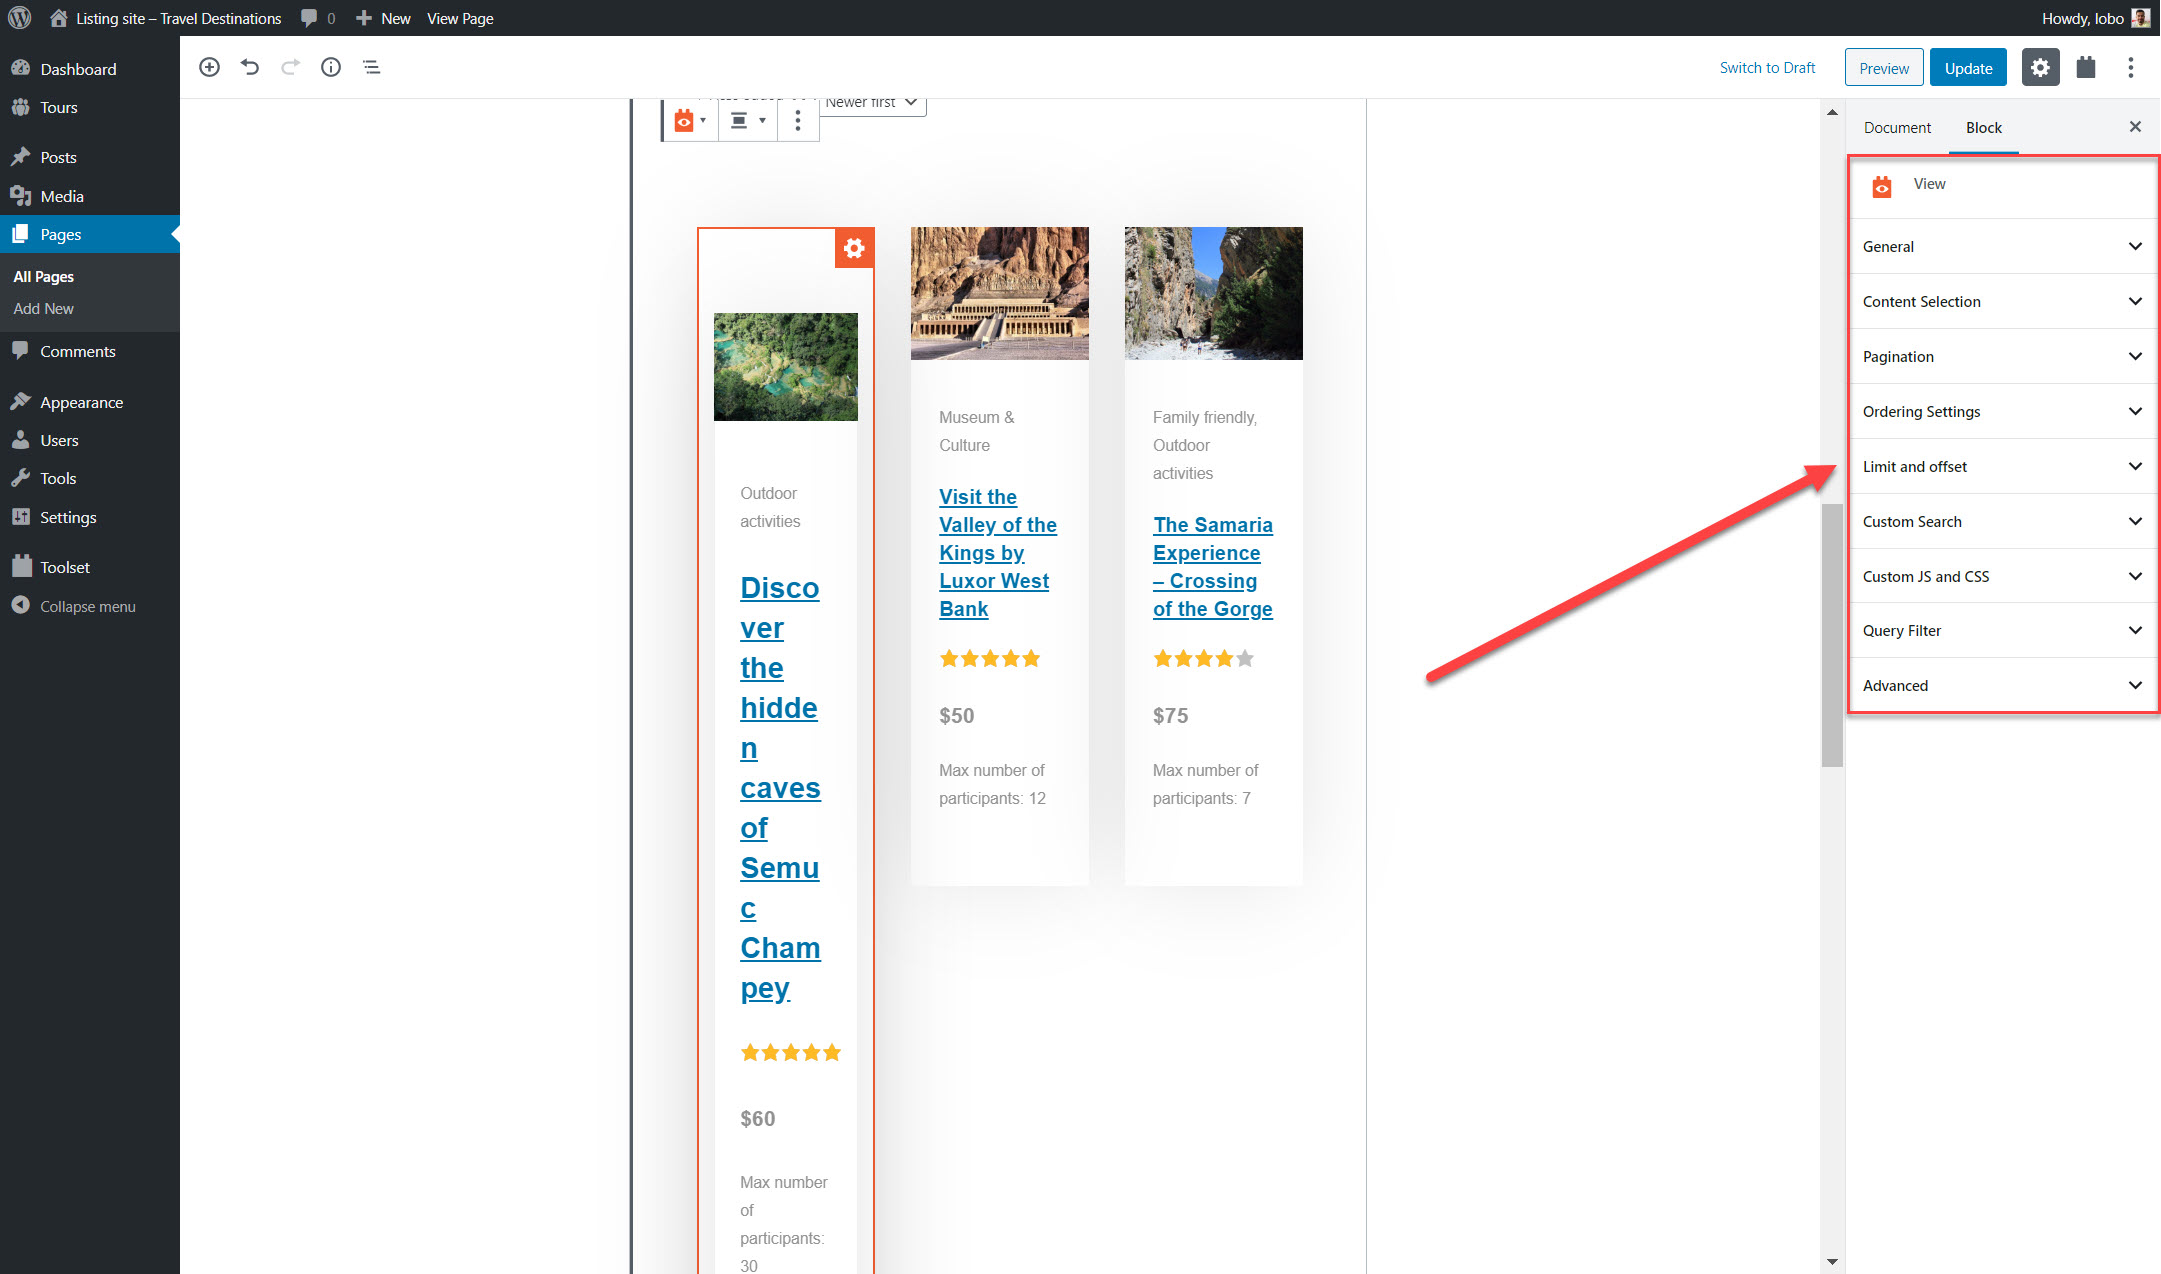
- You can edit the order of your list, the content it displays and much more by clicking Block Navigation and selecting your View. Use the sidebar to go through the options. For example, you can use the Query Filter setting to add filters to only display tours with a rating of more than four stars.
Add a custom search
A custom search is an important tool to help your users find exactly what they are looking for. Just like a search engine, you can use a custom search to narrow down your results.
For example, if you are looking for a tour for less than $200 you can set it using a custom search filter.
- Just like when you display a custom list of content insert a View block into your page.
- In the View creation wizard enable the Search option.
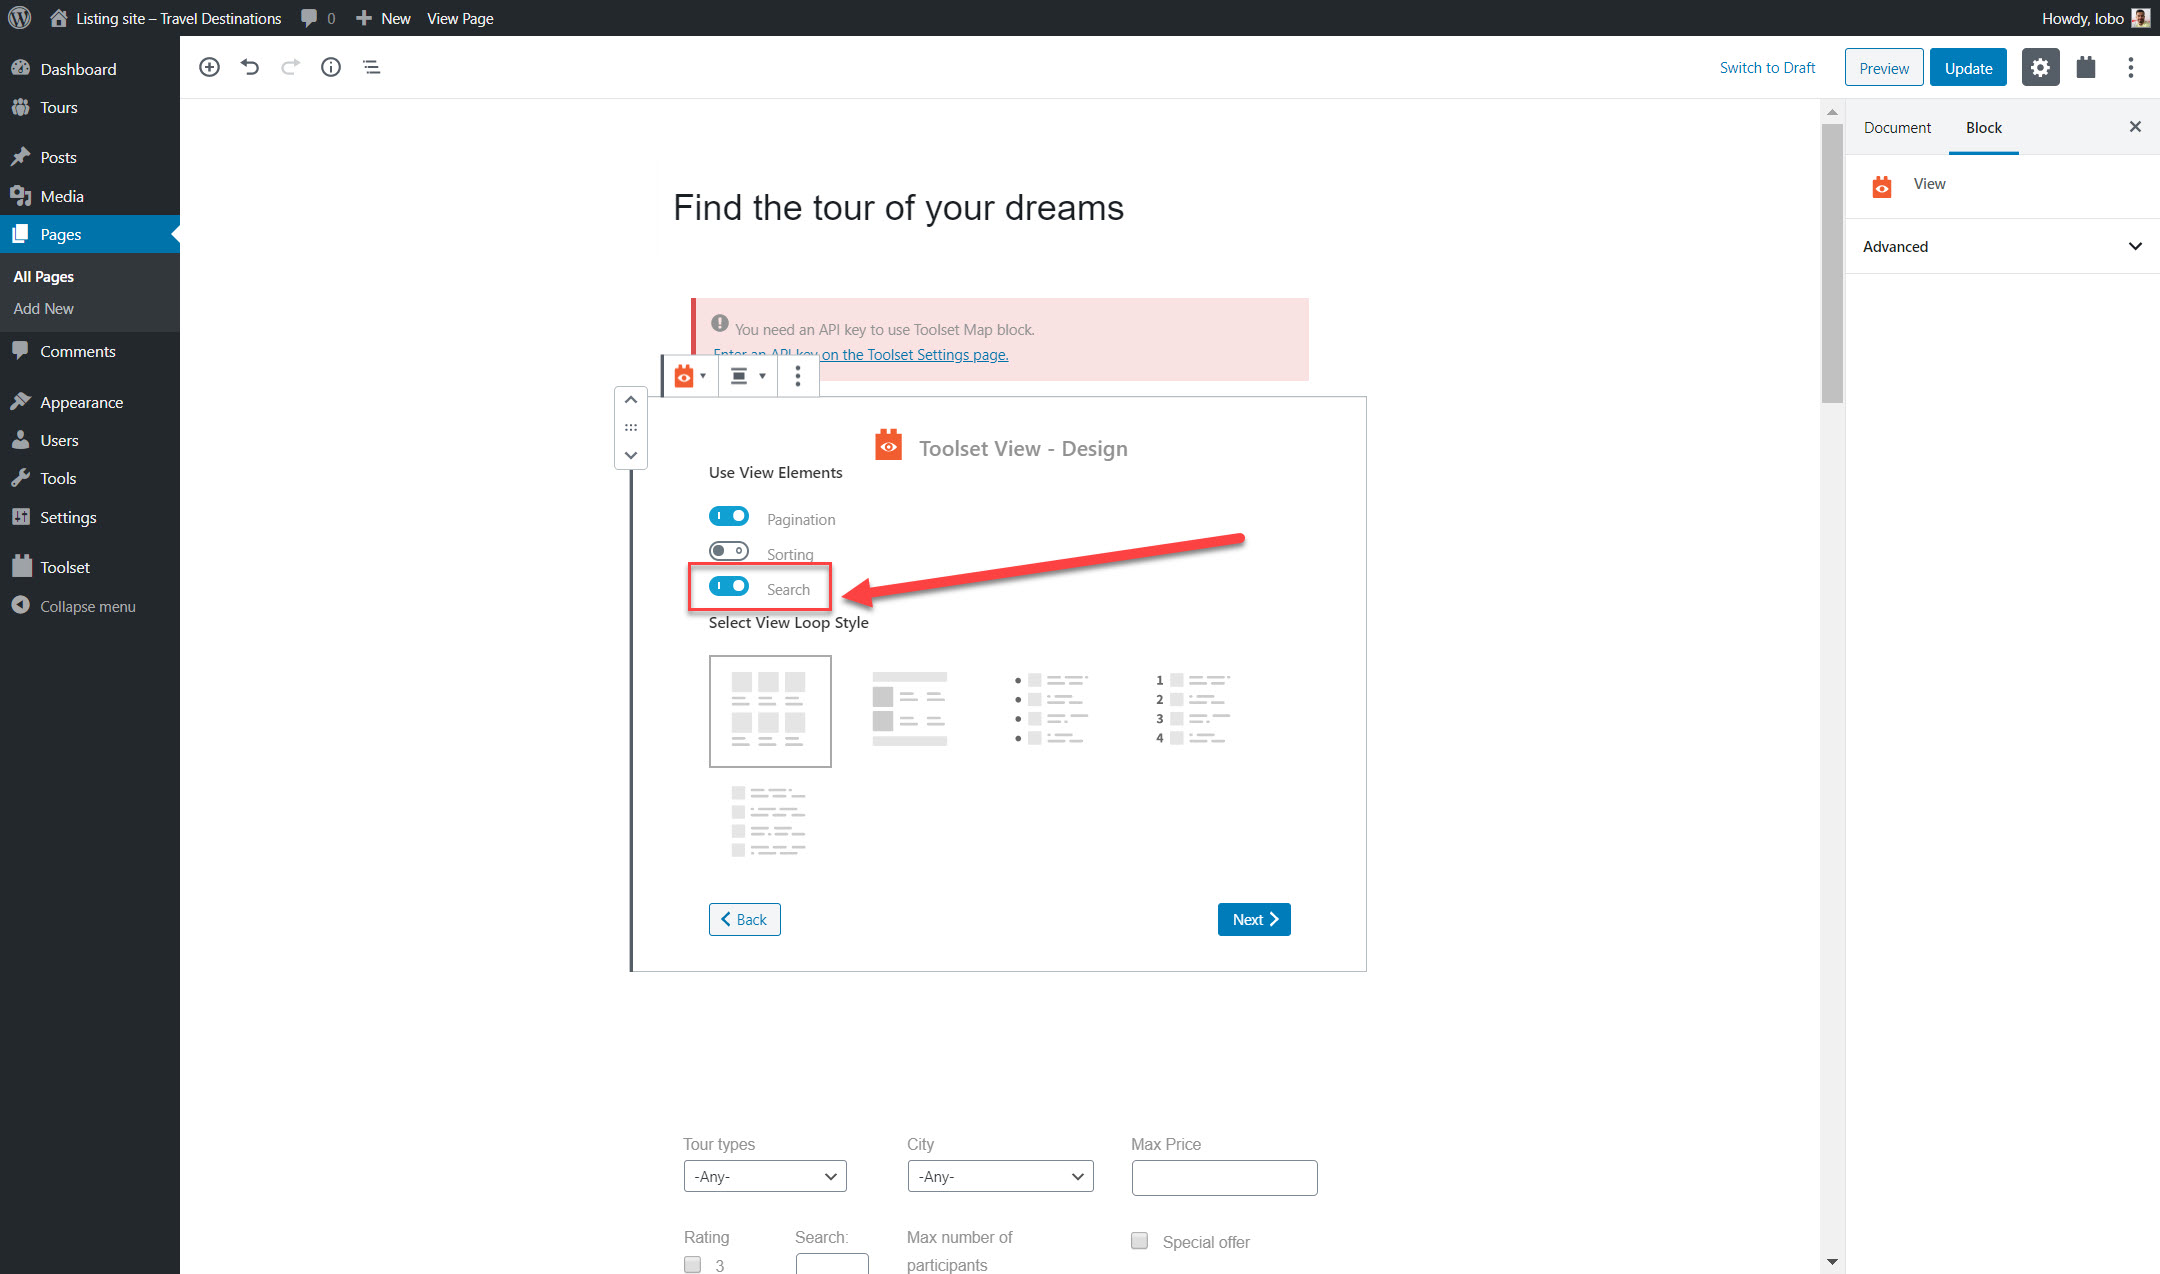
- You can now add Search Fields, Search Buttons and many more options in the Views editing area.
- Just like with the other features you can use the right sidebar to make any changes including labels, stylings and the main field settings.
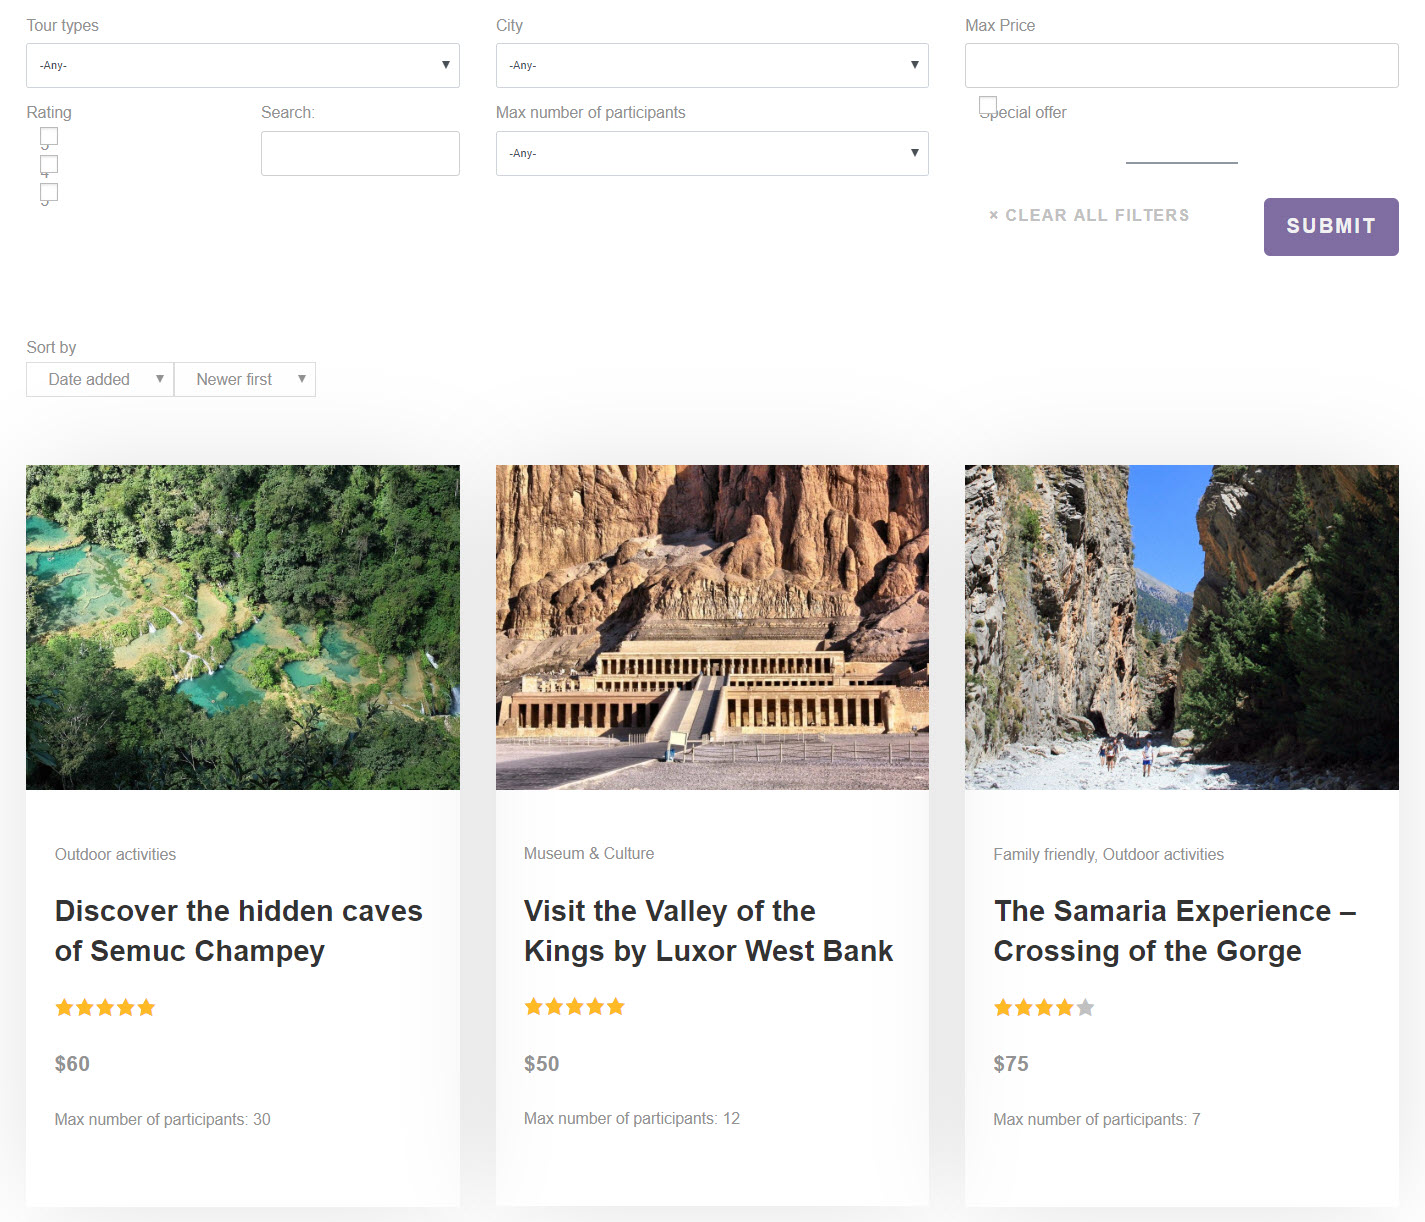
Here is how the custom search looks on the front-end, complete with filters for the name, minimum rating and types of gyms.
Build your complex website using OceanWP and Toolset today!
Now that you have an idea of how easy it is to build complex websites without any coding at all you can get started today. All you need is OceanWP and the plugins associated with it including Toolset.
Have you built your custom website using Toolset and OceanWP? Let us know your experiences of it in the comments below!
How To Create Dynamic Content In Wordpress
Source: https://oceanwp.org/blog/how-to-create-custom-websites-with-dynamic-content-using-toolset-and-oceanwp/
Posted by: sheltonhemperess.blogspot.com

0 Response to "How To Create Dynamic Content In Wordpress"
Post a Comment